
Overview – Change Font Size in Windows 11
The Font Size refers to the size of the characters that appear on the screen. Most users will be satisfied with the default font settings, however others may choose to change the font size depending on their needs.
Let’s breakdown what we’re going to cover in this article:
- Change Font Size in Windows
- Change Font Size Specifically for Browsers
How To Change Font Size in Windows 11
1. Change Font Size using Windows Settings
Step 1: Open the Windows Settings from the Start menu or press the “Windows Logo Key + I” key combination.

Step 2: Select the “Accessibility” tab from the left sidebar and click the “Text Size” on the right pane.

Step 3: To increase the text size, drag the slider to the right and click the “Apply” button to make changes take effect.


2. Change Font Size using Layout Scaling
Step 1: Open the Windows Settings from the Start menu or press the “Windows Logo key + I” key combination on the keyboard.
Step 2: Select the “System” tab from the left sidebar and click the “Display” button.
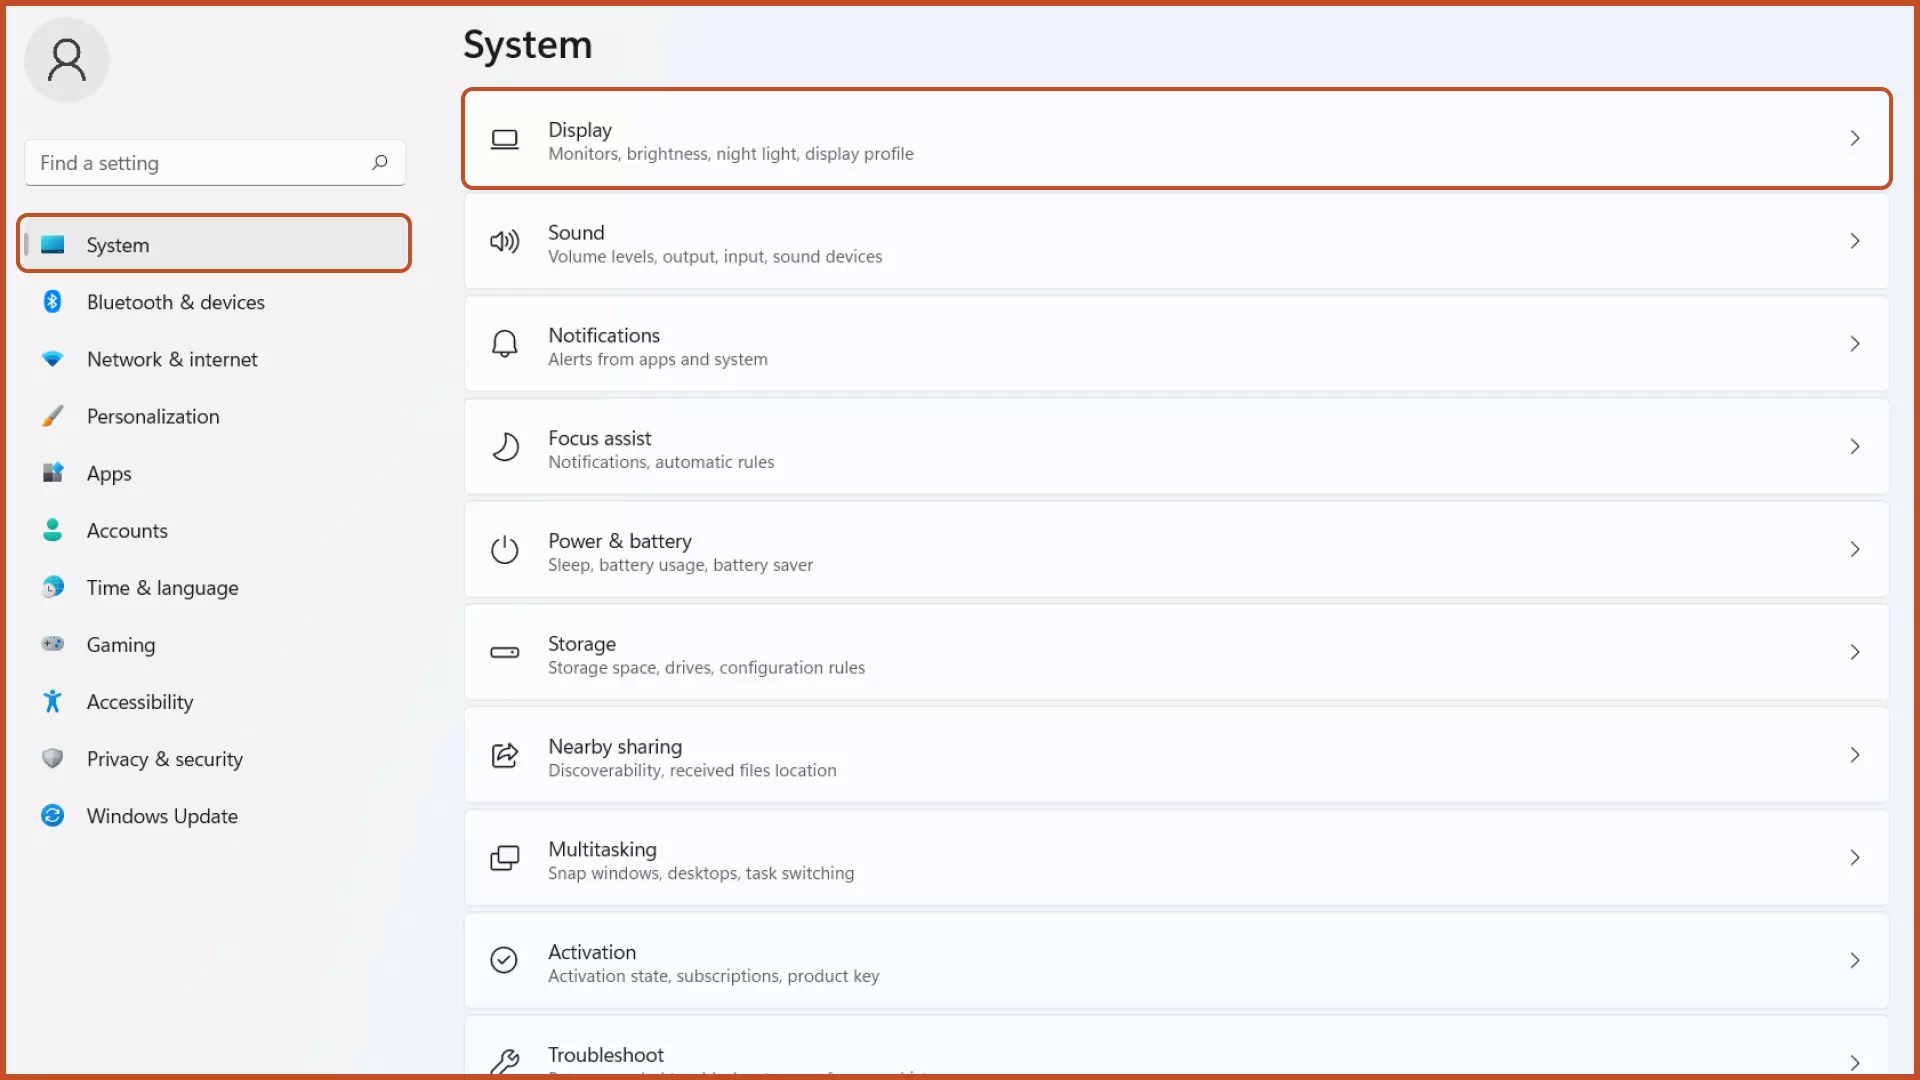
Step 3: Scroll and select the desired scale from the dropdown menu under the scale & layout section.


Note: To add custom scaling, click the Scale button, add the desired scaling and click the “Tick” button on the right side to save changes.

3. Change Font Size using Built-In Windows Utility: Magnifier App
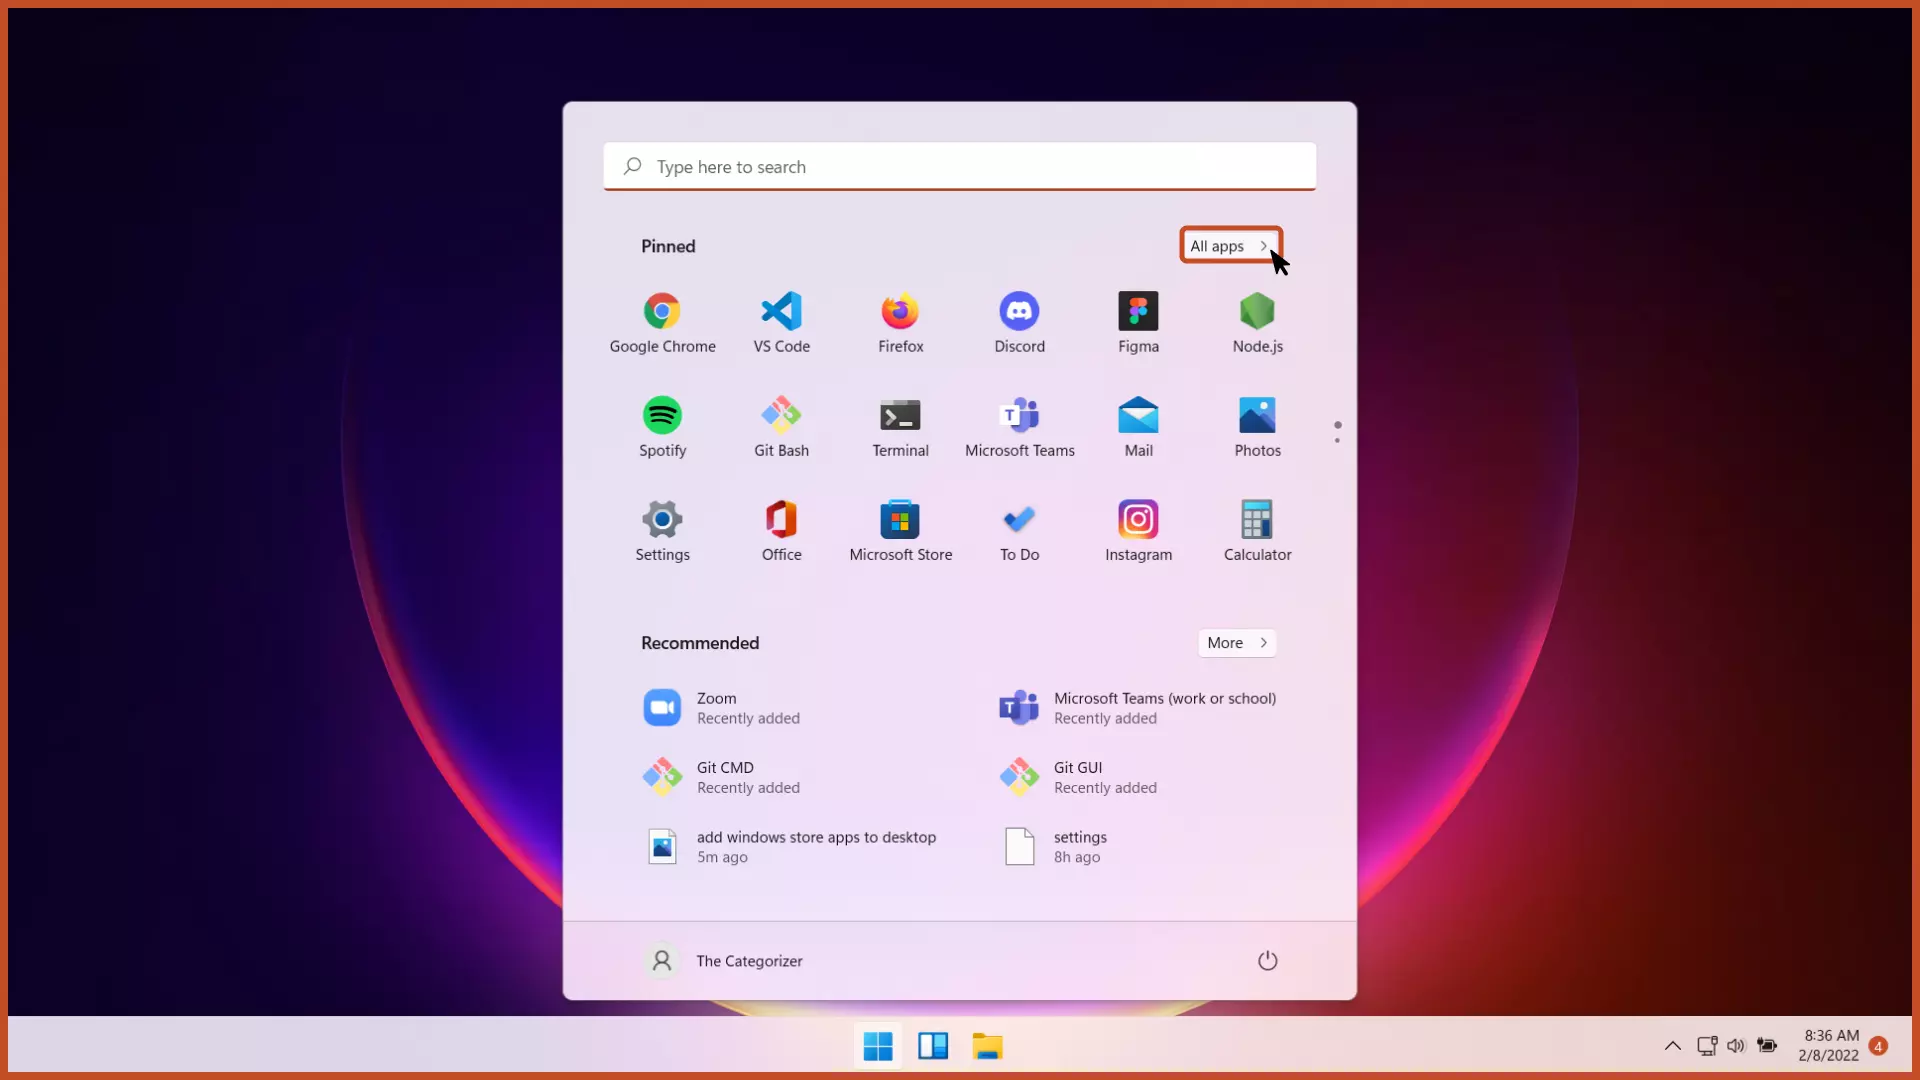
Step 1: In the Start menu, click the “All apps” button.
Step 2: Scroll and click the “Windows Ease of Access” folder.

Step 3: Click the “Magnifier” app.

Step 4: To increase the layout size, click the “+” button. Click the “-” button to decrease the size.

How To Change Font Size in Browsers
1. Change Font Size in Browsers using Browser Settings
Step 1: Open the browser for which you want to change the font size.
Step 2: Click the vertical menu on the top-right side of the window and select the “Settings” button.

Step 3: Click the “Appearance” tab from the left sidebar and select the desired font size from the dropdown menu on the right pane.


2. Change Font Size For Browser using Keyboard Shortcut
To increase the font size in browsers, press the “Ctrl and +” key combination on the keyboard. Press the “Ctrl and -” key combination to decrease the font size in browser.

Related Article: Set Default Browser in Windows 11.
How To Restore Default Font Settings
Step 1: Open the Control Panel from the Start menu.
Step 2: Click the “Appearance and Personalization” button.

Step 3: Select the “Change Font Settings” option.

Step 4: Click the “Restore default font settings” button and click the “OK” button.


Next Steps
We’ve covered how to change text size in Windows 11 along some alternative ways to do so.
Depending on your requirements, eyesight and ease of seeing, you can adjust the font size of monitor by following the different methods listed above. In case, some custom font settings gets misconfigured, you can reset it to default by using the control panel, as explained above.
Further, improve your monitor’s display settings by referring to the related articles below.
Related Articles

Calibrate Monitor in Windows 11
Improve the display quality of monitor in Windows by adjusting the RGB, HSV, Brightness, Color, Contrast and Gamma Values manually.

Change Screen Resolution in Windows 11
Increase the screen resolution for better display quality by increasing the number of pixels. Higher the resolution, better the image quality.

How To Set Custom Cursor in Windows
Change the default Windows cursor to a new custom one for better visibility and enhanced customization.
