Overview – Clean Temporary Files
It seems that you want to automate the task of cleaning temporary files on your computer so that you can focus on other important tasks without moving out of storage.

Data storage is already one of the biggest problems in computing. By default, Windows doesn’t delete the temporary files automatically, it becomes more terrible when your computer keeps storing temporary files in a bulk. By the end of this article, you’ll be able to clean temporary files on your computer automatically:
1. Delete Temporary Files using Windows Settings
Step 1: In the Start menu, search for “Windows Settings” and hit the enter key or press the “Windows Logo key + I” key combination on the keyboard.

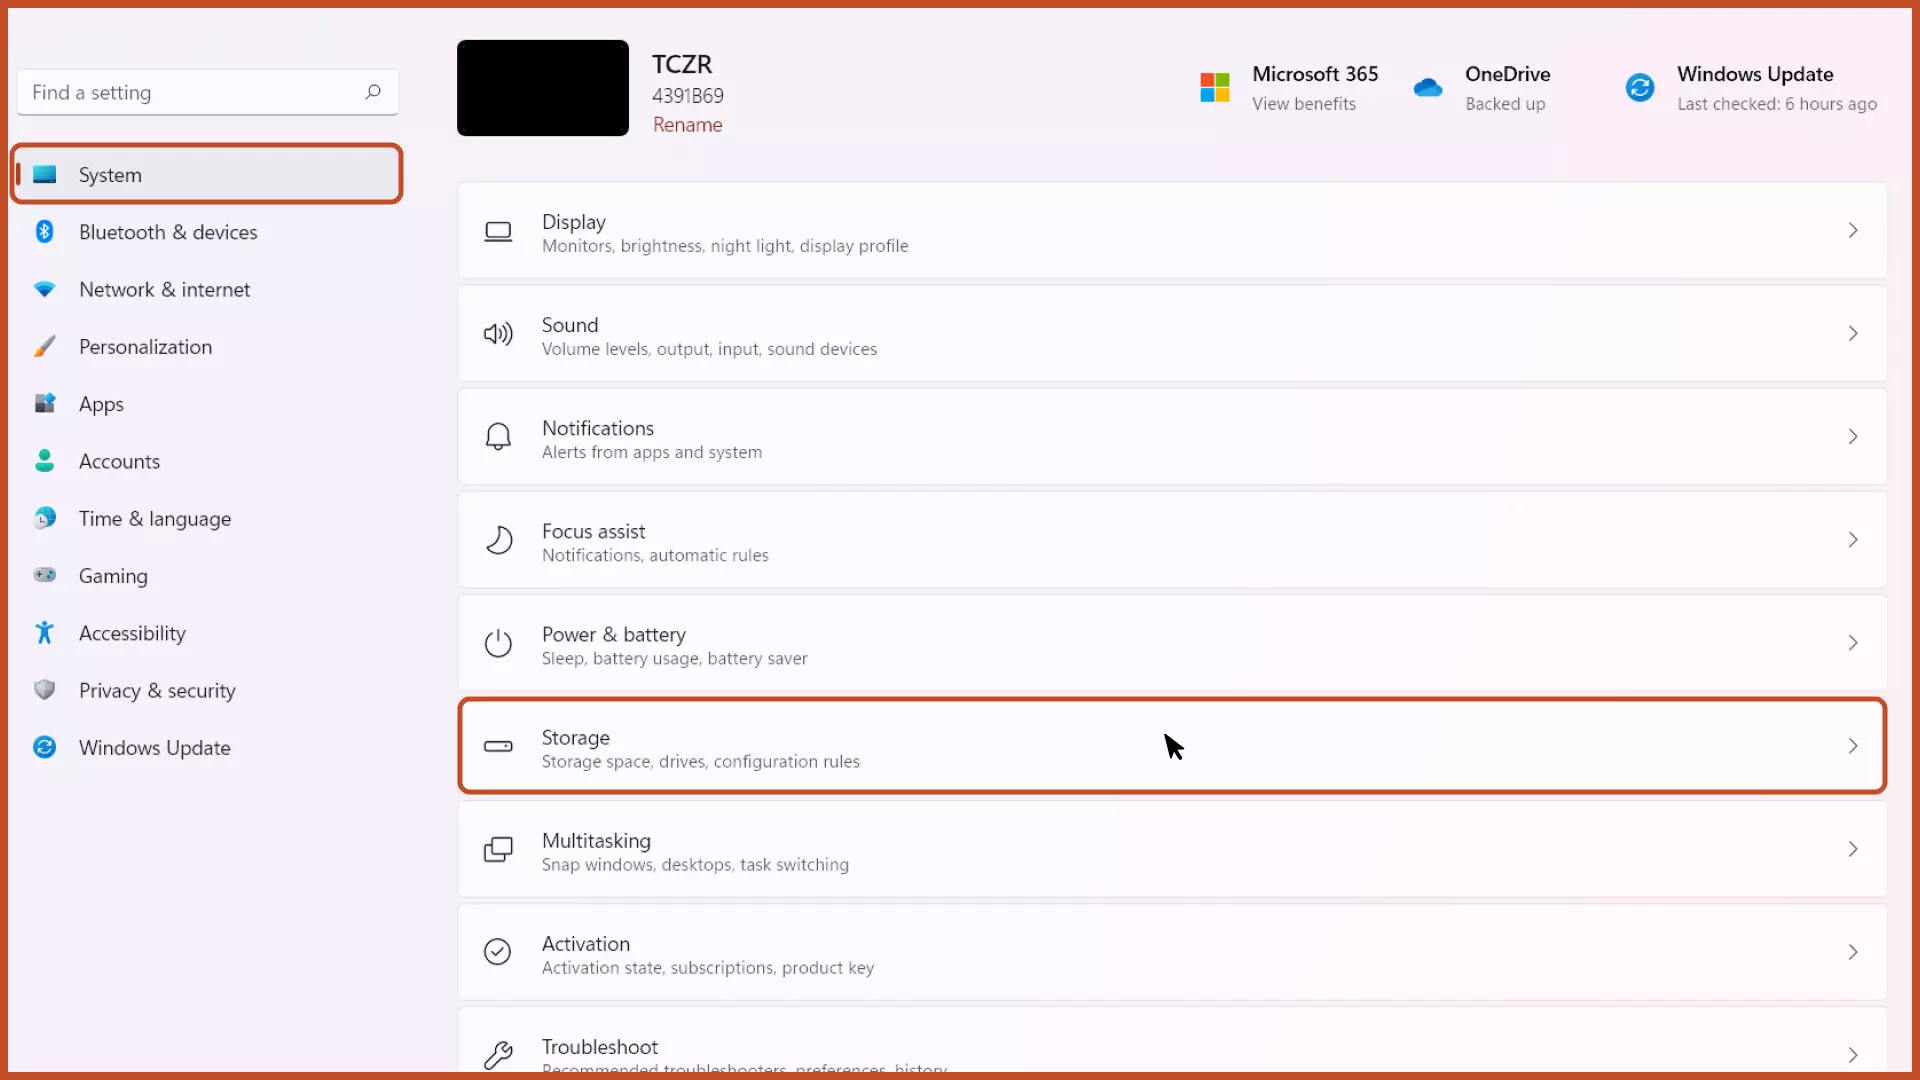
Step 2: Select the “System” option from the left sidebar and click the “Storage” button.
Step 3: Toggle on the “Storage Sense” button and configure it depending on your preferences. The next time storage sense scans your PC, the temporary files will be removed.

Read More: How To Enable and Configure Storage Sense.
2. Delete Temporary Files using Batch Script
Step 1: Right-click the desktop and create a new “Text Document” (Notepad) file from the context menu or open the notepad app from the Start menu.
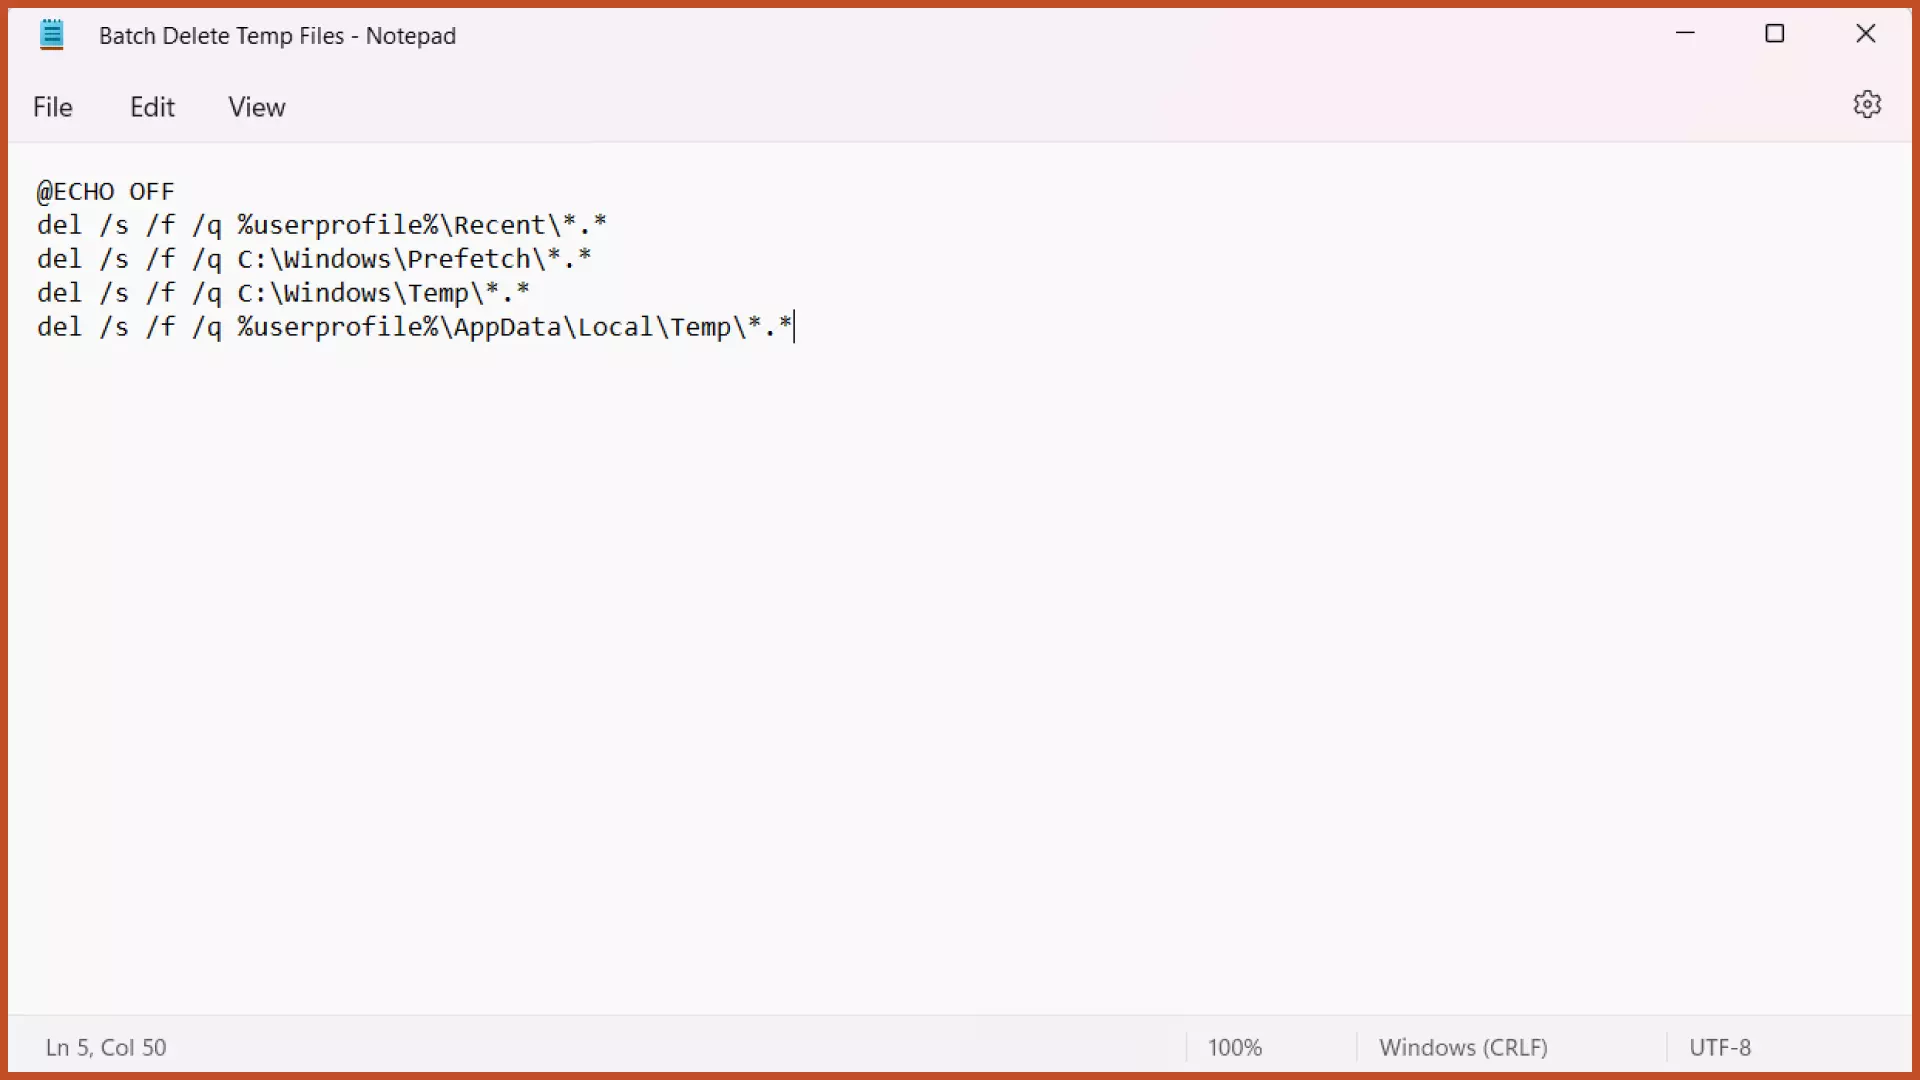
Step 2: Copy and Paste the following script and save the file in the desired location on your computer:
@ECHO OFF
del /s /f /q %userprofile%\Recent\*.*
del /s /f /q C:\Windows\Prefetch\*.*
del /s /f /q C:\Windows\Temp\*.*
del /s /f /q %userprofile%\AppData\Local\Temp\*.*
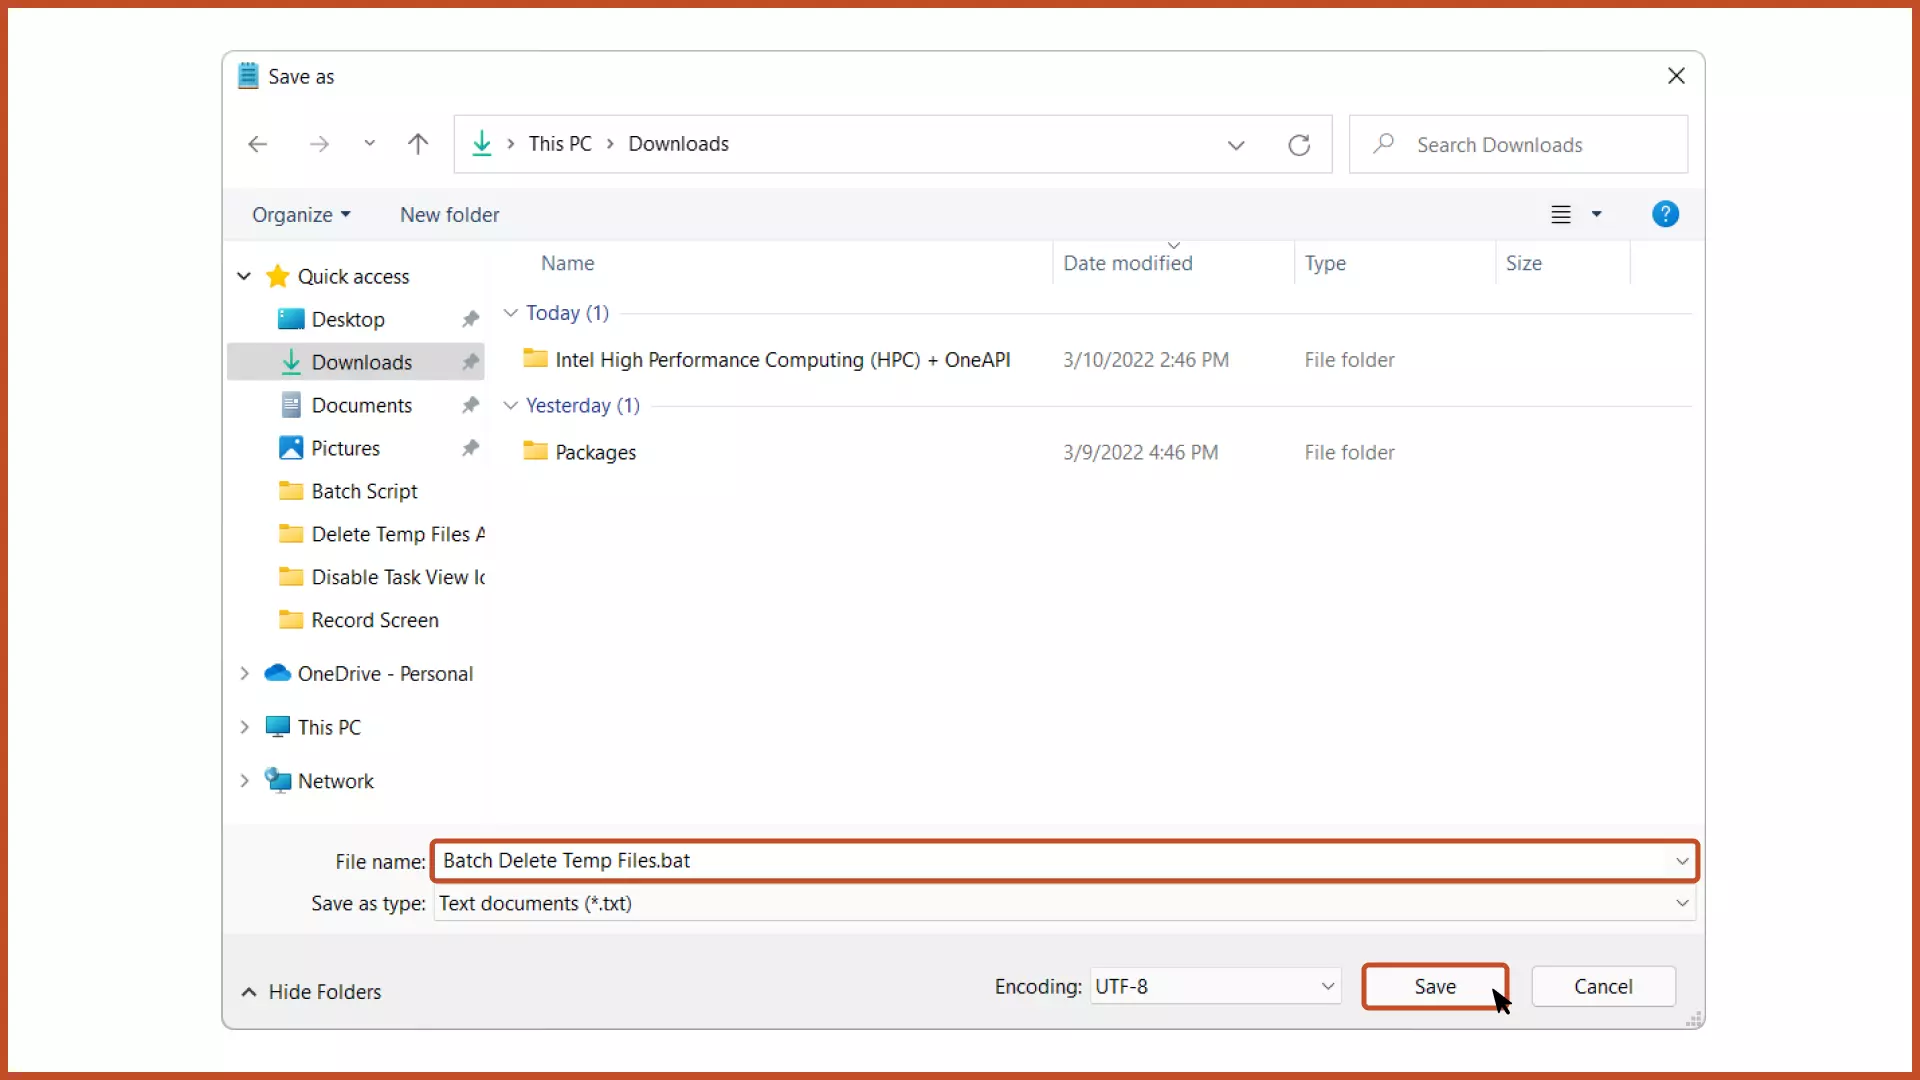
Step 3: Click the “File” tab from the top bar and click the “Save as” button.

Step 4: Rename the file extension from “.txt” to “.bat” (Batch File).

Step 5: Run the batch file as an administrator, the command prompt will run for a few seconds and the temporary files will be automatically deleted.

NOTE: If some temporary files (folders) are not deleted, it means that the files are being created or used by the respective application running in the background.
Read More: How To Disable Background Apps in Windows 11.
3. Delete Temporary Files using Task Scheduler
NOTE: You can use this method only if you’ve followed the steps in Method 2 above and created the batch file.
Step 1: In the Start menu, search for “Task Scheduler” and hit the enter key or press the “Windows Logo Key + I” key combination, type “taskschd.msc” and hit the enter key.
Step 2: Click the “Create Basic Task” option on the right sidebar.

Step 3: Add the task name and description (if any) and press the “Next” button.

Step 4: Set the time when you want to initiate the task automatically and press the “Next” button.

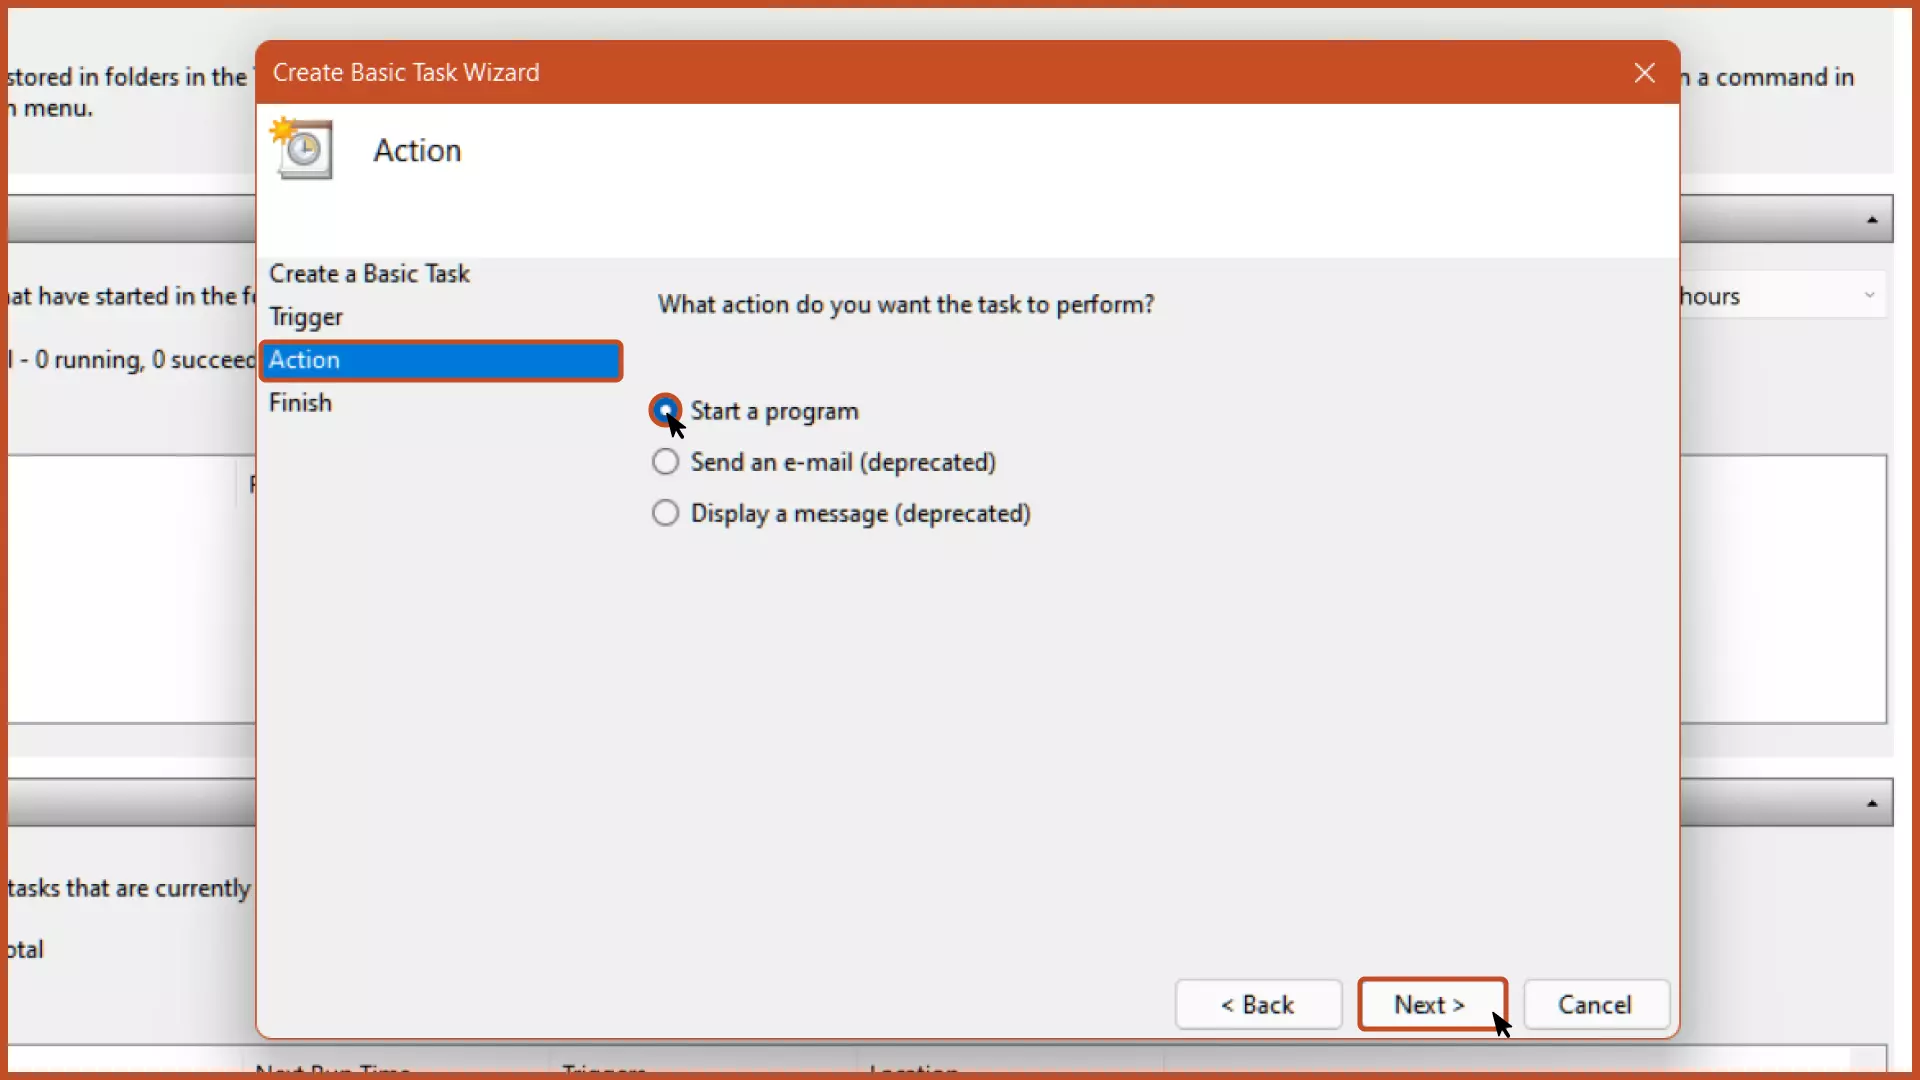
Step 5: In the “Action” tab, select the “Start a program” option.
Step 6: In the “Start a Program” tab, add the file path where you saved the BAT File (in the previous method) and press the “Next” button.

Step 7: Recheck your configurations and press the “Finish” button to clean the temp files automatically (depending on your custom settings).

NOTE: If the steps are correctly implemented, the scheduled task will work correctly. However, to delete the scheduled task, select the task name from the list of running tasks and click the “Delete” button on the right sidebar.

FAQs Related to Temporary Files
Is it safe to delete temp files?
Yes, deleting temporary files in Windows is completely safe. In some cases, you may be unable to remove a few files because you are not an administrator or because such files are being created, written, and stored by the opened programs. In this scenario, simply open the file as an administrator or close the opened programs and remove the temp files.
Next Steps
We’ve covered how to auto clean temp files on Windows. To remove the temp files automatically, you can use any of the methods that you find to be the most convenient and easy to follow along.
Further, improve your computer’s storage-related problems by following the related articles below.
Related Articles
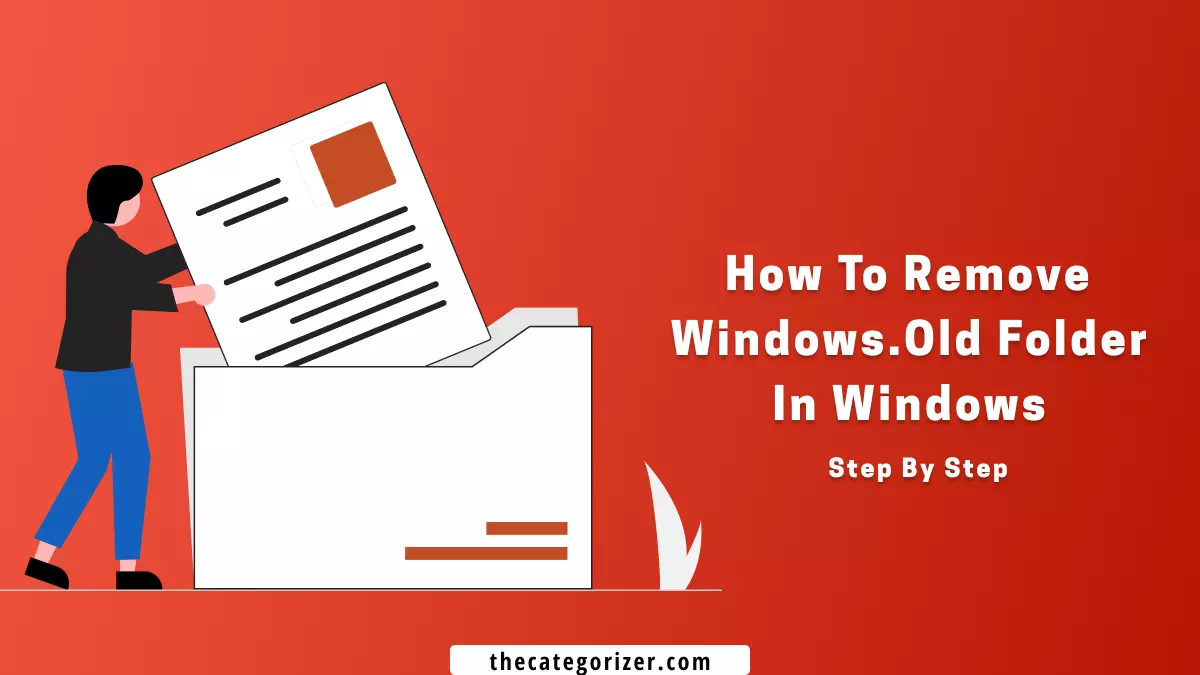
Remove Windows Old Folder
Recently installed a new version of Windows? Free up 15-25 GB of storage by deleting a single unused file on your computer.

Clear Cache on Windows [Complete Guide]
Completely Clear Cache and save some space on your computer.

Check VRAM on Windows 11
VRAM plays a major role in terms of the device’s performance. Check whether or not your version of VRAM is compatible with your device.
