Overview – On-Screen Keyboard in Windows
An on-screen keyboard is a piece of software that replaces your physical keyboard with a virtual one. When you need to type something in Windows, you can use the on-screen keyboard, which is a software keyboard that shows on the screen. It’s a virtual keyboard, which is an alternative to the physical keyboard that you may use to input text into any program. This feature has been around for a long time, and it has been developed over time with additional capabilities and greater usability.
It is designed to be used with touchscreens, but it can also be used with a mouse or a stylus in tablet mode. Although, the tablet mode is depreciated in Windows 11, but it has an additional capability to detect whether the keyboard is attached or detached (Tablet Posture Experience), depending on which it automatically enables the touch keyboard.
It looks that your built-in or external keyboard is malfunctioning, so you need to use the virtual keyboard to enter text into programs. By the end of this article, you’ll be able to open onscreen keyboard in Windows 11:
1. Enable On-Screen Keyboard via Windows Settings
Step 1: Open the Windows Settings app from the Start Menu or press the “Windows Logo key + I” key combination on the keyboard.

Step 2: Select the “Accessibility” tab from the left sidebar, scroll down and select the “Keyboard” option under the “Interaction” section.

Step 3: Toggle on the “On-Screen Keyboard” option under the “On-screen, access keys, and Print screen”.


2. Enable On-Screen Keyboard via Keyboard Shortcut
To turn on the On-Screen keyboard using the keyboard shortcut, press the “Ctrl + Windows Logo key + O” key combination on the keyboard.

3. Enable On-Screen Keyboard via Start Menu
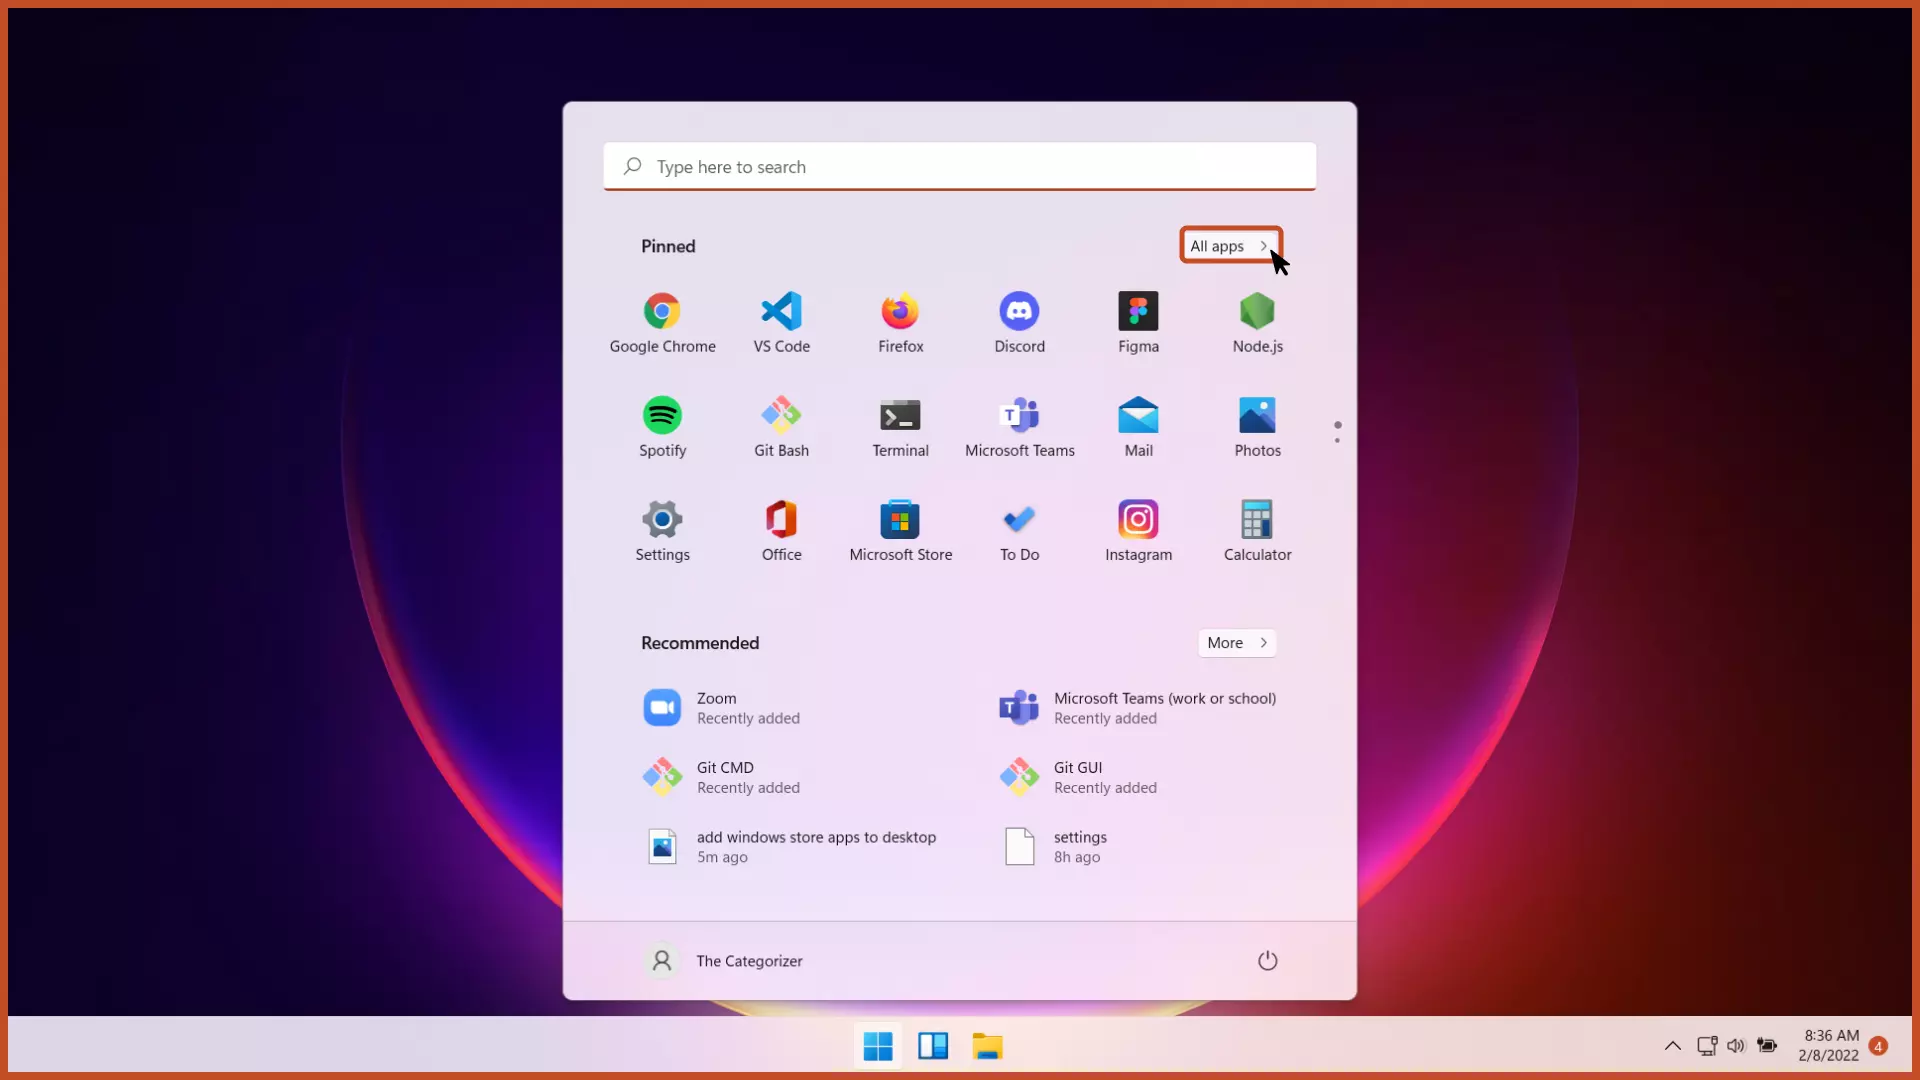
Step 1: Open the Start Menu from the taskbar and click the “All apps” button.
Step 2: Scroll and click the “Windows Ease of Access” folder.

Step 3: Click the “On-Screen keyboard” button to open it.

4. Enable On-Screen Keyboard via Control Panel
Step 1: Open the Control Panel from the Start menu.
Step 2: Click the “Ease of Access” Button.

Step 3: Click the “Ease of Access Center” Button.

Step 4: To open the on-screen keyboard, click the “Start On-Screen Keyboard” button.

5. Enable On-Screen Keyboard via Command Prompt or PowerShell
Step 1: Open the Command Prompt or PowerShell from the Start menu.
Step 2: To turn on the On-Screen Keyboard, type the command: “osk” (without quotation marks) and hit the enter key.

6. Enable On-Screen Keyboard via Windows RUN
Step 1: Press the “Windows Logo key + R” key combination on the keyboard to open the Windows Run.
Step 2: To open the on-screen keyboard, type “osk” (without quotation marks) and click the “OK” button or hit the enter key.

7. Enable On-Screen Keyboard via Desktop Shortcut
Step 1: Right-click the desktop and add a new “Shortcut” file.

Step 2: In the item location, type: C:\WINDOWS\System32\osk.exe, and click the “Next” button.

Step 3: Allot any file name to the shortcut and click the “Finish” button to create the On-Screen keyboard shortcut.

Step 4: The shortcut will be created on the desktop. Click the On-Screen keyboard shortcut to open it.
FAQs Related to On-Screen Keyboard
Where is the On-Screen Keyboard located in Windows?
The On-Screen keyboard is actually located at C:\WINDOWS\System32 with the executable file named osk.exe.
What is Difference Between On-Screen Keyboard and Touch Keyboard?
The size of the on-screen keyboard may be changed, but the touch keyboard has limited scaling options. In terms of customizing the UI, however, the touch keyboard is more flexible than the on-screen keyboard.
Next Steps
We’ve covered how to enable and open on-screen keyboard in Windows 11. You can use any one of the methods listed above. If your keyboard is not functioning, you may try reinstalling respective drivers on your computer to ensure that the issue isn’t related to the computer’s drivers, otherwise you may keep using the On-Screen keyboard.
Further, customize your device’s settings by referring to the related articles below.
Related Articles

Disable Sticky Keys in Windows
Are you having trouble pressing two key combinations in a row? It’s because the sticky keys may have accidentally turned on. Find out how to turn it off and solve the problem.
Troubleshooters in Windows 11
Fix customization, connectivity, drivers, and external device related problems on your computer using the built-in Windows Troubleshooters.

Clean Windows.Old Folder in Windows
Freshly installed or upgraded Windows on your computer? Free up 20-25 GB of storage on your computer just by deleting a single, unused folder.
