
Overview – Change Mouse Pointer
One of the reasons for the popularity of Windows 11 is its user interface design (UI Design). Even if you’ve switched to a tablet or touchscreen device like Microsoft’s amazing Surface Pro series, there are times when you simply need your trusty old cursor, especially with an operating system that still favors the traditional desktop (i.e., Windows). By default, a small-sized, white-colored mouse pointer is available on Windows. However, this does not imply that you must use the default setting.
It appears that you’ve grown bored of staring at the cursor while working and believe that it does not complement the aesthetics of Windows 11.
By the end of this article, you will be able to add a custom cursor in Windows:
Method #1: Using Windows Settings
Step #1: Type and open the “Windows Settings” from the Start menu or press the “Windows key + I” key combination.

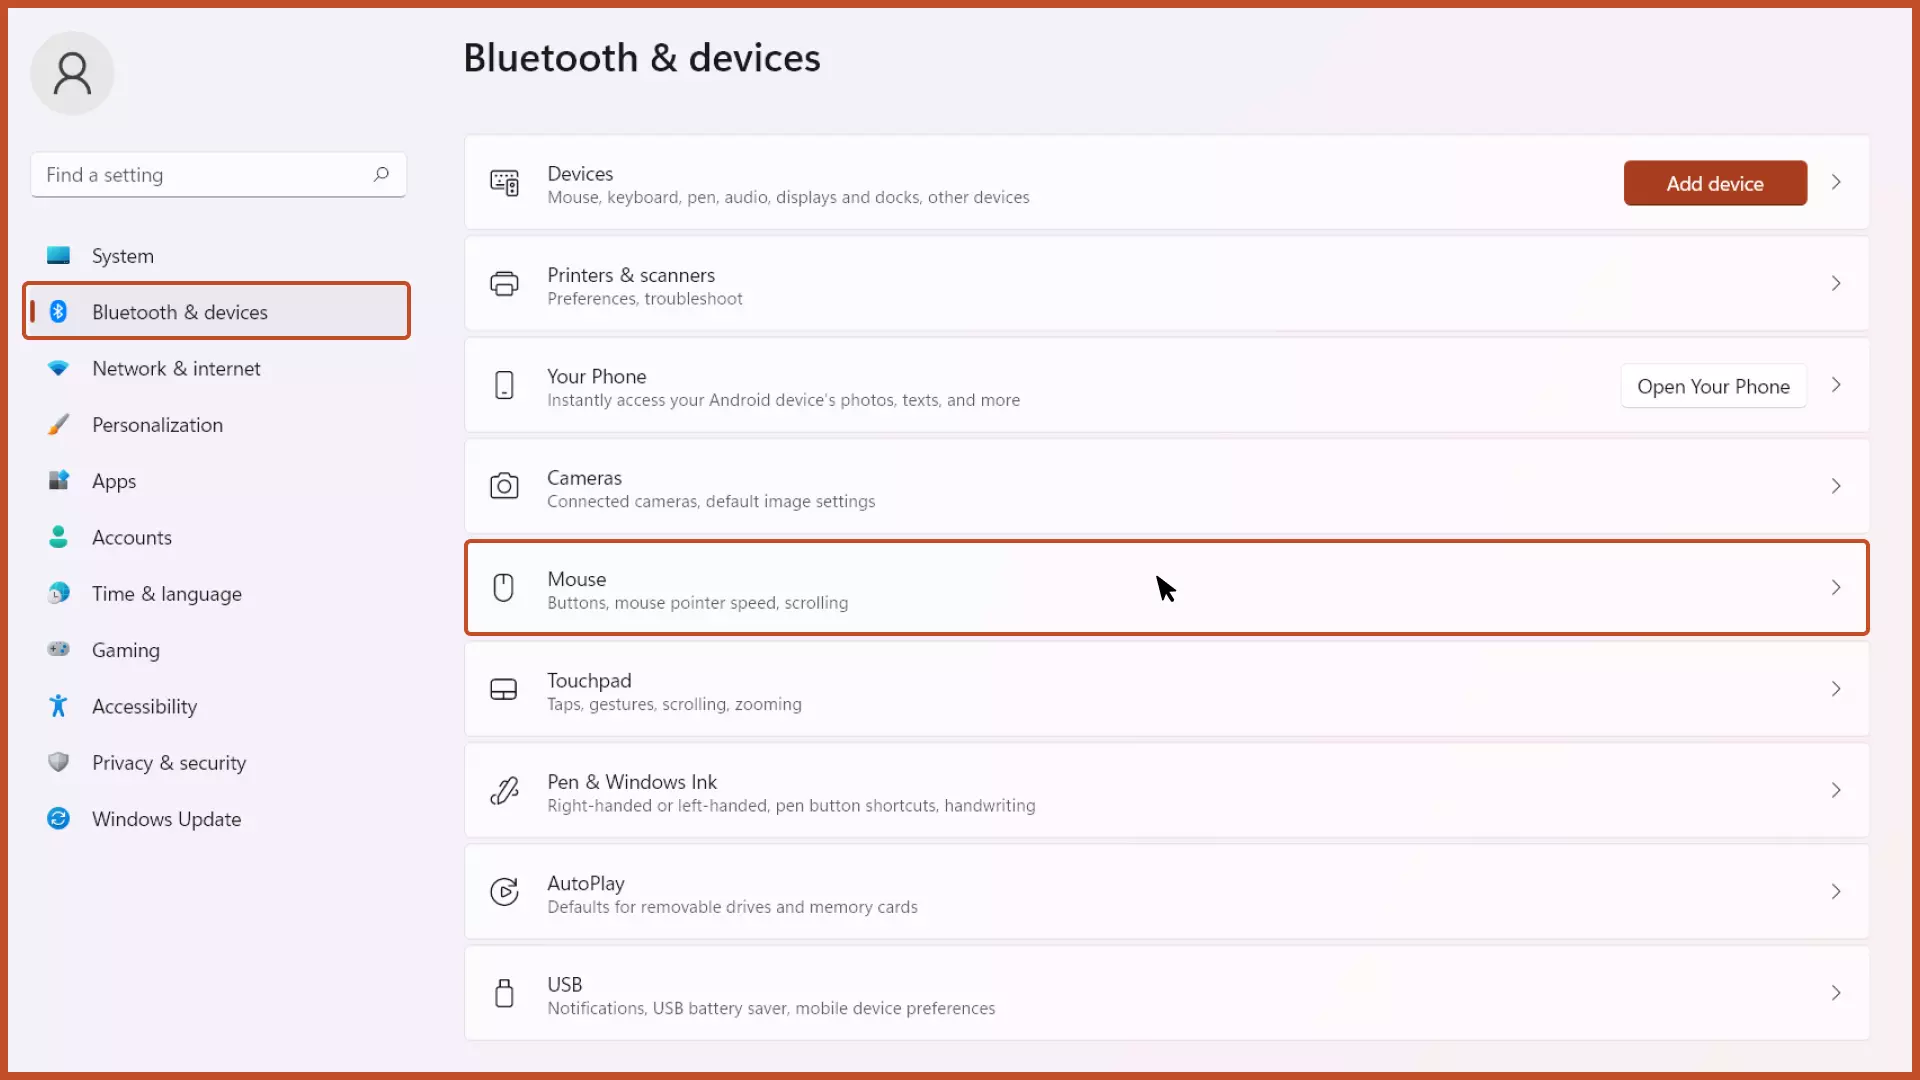
Step #2: Select the “Bluetooth and Devices” option from the left sidebar and select the “Mouse” option.
Step #3: Select the “Additional Mouse Settings” option in the Related Settings section.

Step #4: A popup will appear. Select the “Pointers” option from the top menu and click the “Browse” button.

Step #5: Select the Cursor that you want to set as default and press the “Open” button.

Step #6: Press the “Apply” button and the mouse pointer will be changed.

Note: To add a custom cursor with another design, download the Custom Cursor design from Cursor Library and you can follow the steps above, select the cursor design in the animated cursor (.ani) or static cursor (.cur) format. Click the browse button and choose the downloaded custom cursor and press the “Apply” button to make changes take effect.
Method #2: Using Control Panel
Note: This method is almost similar to the method above.
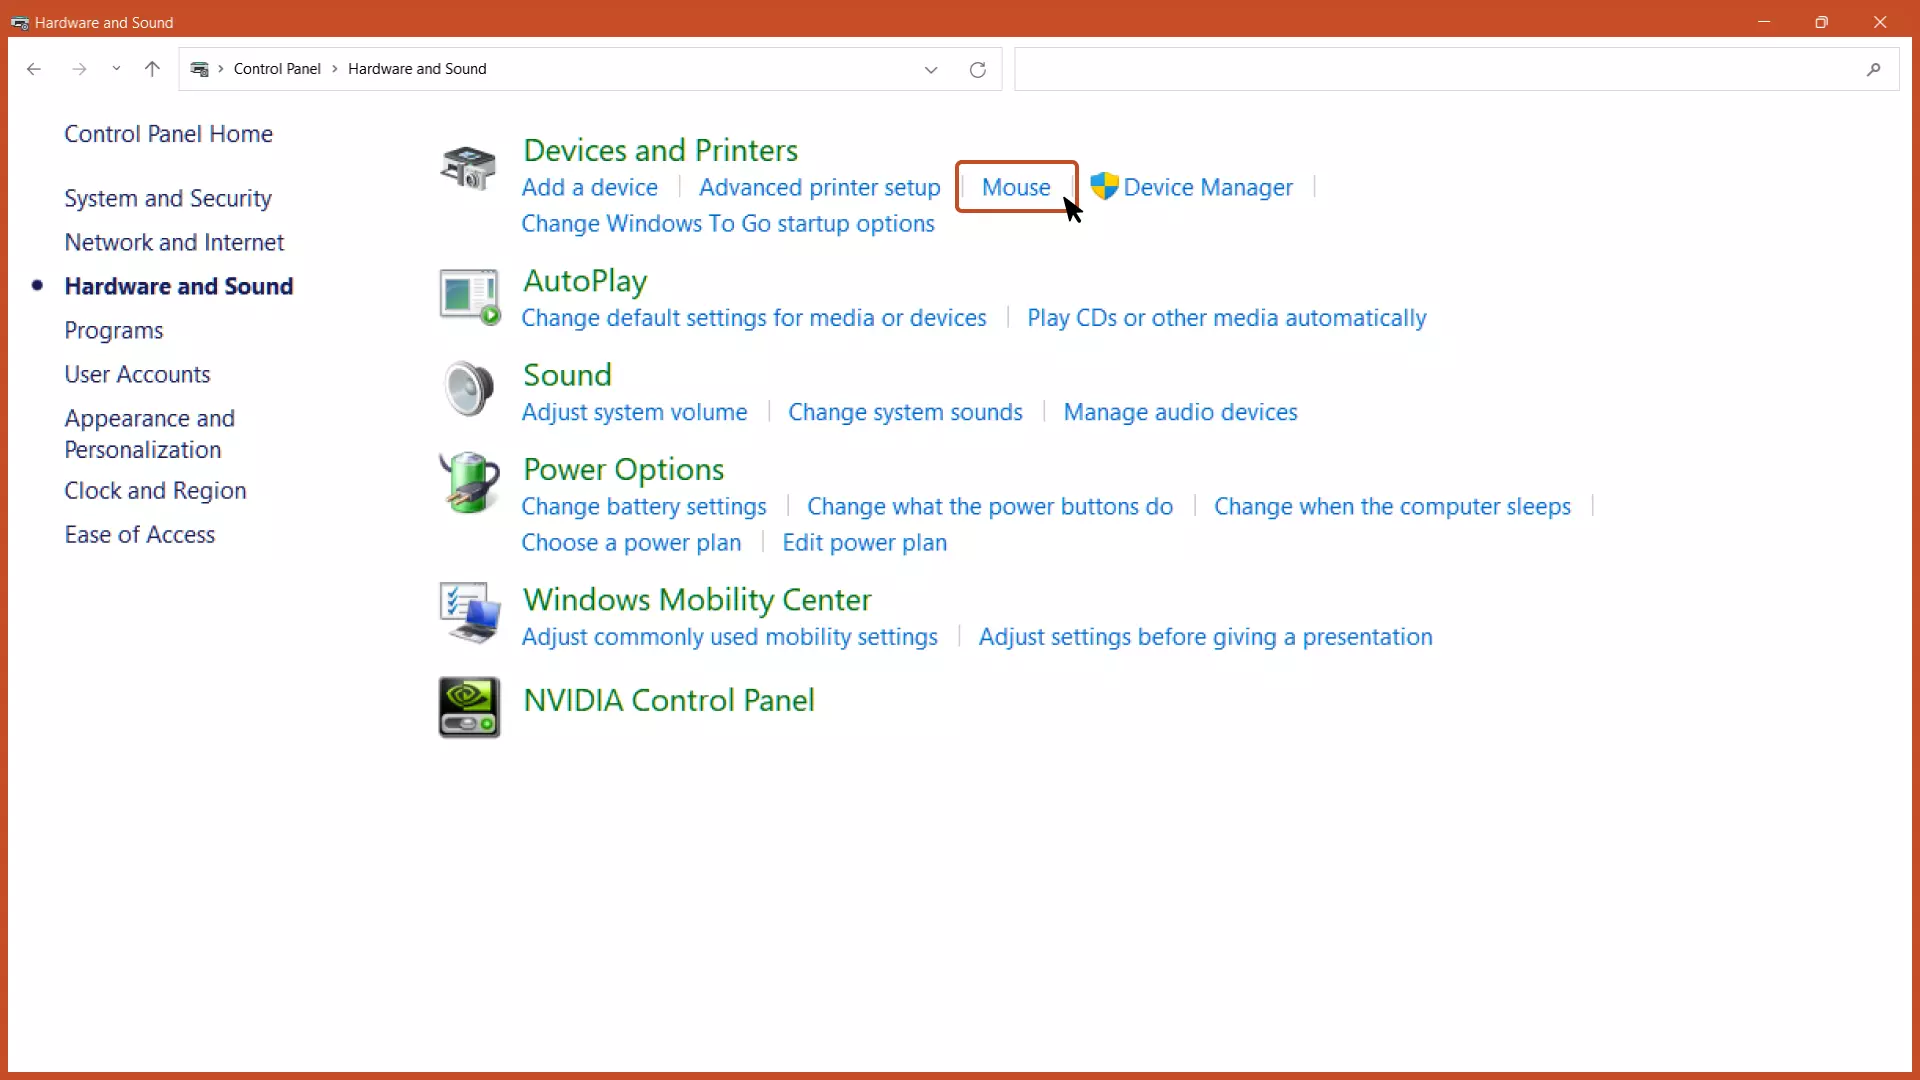
Step #1: Open the “Control Panel” from the Start menu and select the “Hardware and Sound” option.

Step #2: Select the “Mouse” option in the “Devices and Printers” section.
Step #3: A popup will appear. Select the “Pointers” option from the top menu and click the “Browse” button.


Step #4: Select the Cursor that you want to set as default and press the “Open” button.

Step #5: Press the “Apply” button and the mouse pointer will be changed.

Note: To add a custom cursor with another design, download the Custom Cursor design from Cursor Library and you can follow the steps above, select the cursor design in the animated cursor (.ani) or static cursor (.cur) format. Click the browse button and choose the downloaded custom cursor and press the “Apply” button to make changes take effect.
FAQs Related to Changing Cursor Style
How to restore the default cursor in Windows 11?
Go to Windows Settings > Bluetooth & devices > Mouse > Additional mouse settings > Pointers > Select the Use Default option > Press the Apply button.
How many types of cursor can we add in Windows?
Currently, Windows supports the Static Cursor (.cur) and the Animated Cursor (.ani) file formats. The static cursor, as the name suggests: it’s a non-animated cursor, and the animated cursor as the name suggests: it’s dynamic in nature.
Next Steps
We’ve covered how to change the mouse pointer on Windows. To change the mouse pointer, you can use any of the methods that you find to be the most convenient and easy to follow along.
Further, customize the Windows User Interface (UI) by following the related articles below.
Related Articles

Disable Notifications in Windows 11
Disable the obstructive notifications and improve your productivity while working.

Block Popups in Any Browser
Disable the repetitively occurring popups in the browser and improve enhance your experience.

Auto Delete Temp Files on Windows 11
Completely remove the temp files from Windows automatically so that you can focus on the tasks that matter the most for you.
