
Overview – Install Fonts in Windows 11
Installing fonts on Windows may be a time-consuming process as you might get confused between different sorts of typefaces, each with its own set of installation requirements.
Windows support different font formats such as OpenType (.otf), SVG, Embedded Open Type (.eot), TrueType (.ttf), WOFF, and WOFF2, which are accessible using Microsoft Windows Font Viewer. It seems that you want to add some fonts in some software for which you first need to install them on your local computer.
Let’s break down what we’re going to cover in this article:
- Install Fonts in Windows 11
- Uninstall Fonts in Windows 11:
4 Ways To Install Fonts in Windows 11
1. Using Font File (Default Installer)
Step 1: Download the desired font.
Step 2: Extract the font file (Zip Format) to the desired location on your computer using software such as 7-Zip and WinRAR.
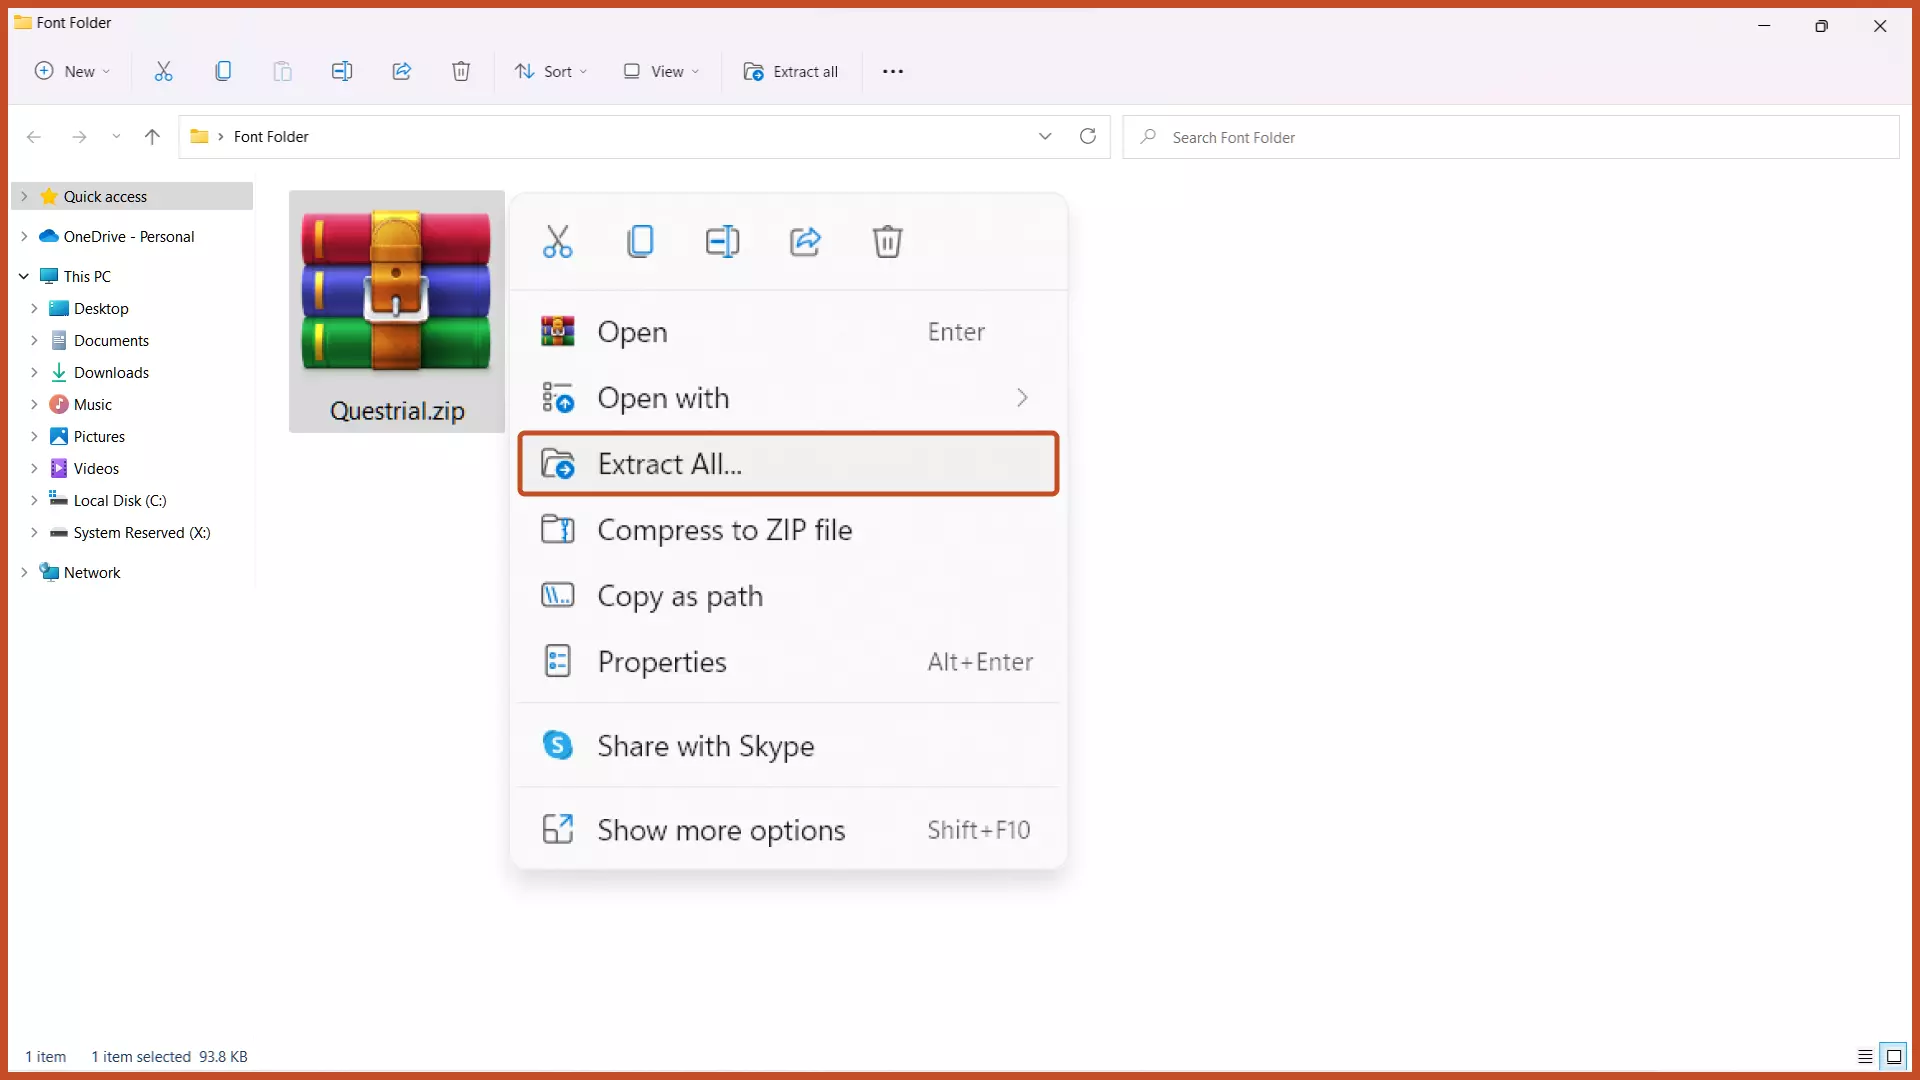
Step 3: To install fonts in Windows, double-click the font file and click the “Install” button.


2. Using Windows Settings
Step 1: Download the desired font.
Step 2: Open the Windows Settings from the Start menu or press the “Windows key + I” key combination on the keyboard.

Step 3: Select the “Personalization” tab from the left sidebar and click the “Fonts” button on the right pane.

Step 4: To add fonts in Windows, simply drag and drop the font from any directory on your computer to the Fonts section in Windows Settings.


3. Using Microsoft Store
Step 1: Open the Microsoft Windows Store from the Start menu.
Step 2: In the search bar, type “Fonts” and click the “Explore New Fonts” option.

Step 3: Select the font that you want to install.

Step 4: Click the “Get” button to download and install the font on Windows.


Note: A limited variety of fonts are available in the Windows Store out of which some are free, while some are paid.
4. Install Multiple Fonts at Once
Step 1: Download the Font Bundle.
Step 2: Extract the Font Bundle to the desired location.

Step 3: In the font folder, press the “Ctrl + A” key combination to select all fonts in the folder, right-click and click the “Install for All Users” option.


2 Ways To Uninstall Fonts in Windows 11
1. Using Control Panel
Step 1: Open the Control Panel from the Start menu and click the “Appearance and Personalization” option.

Step 2: Click the “Fonts” button and you’ll see all the fonts installed on your computer.

Step 3: Single-click the font that you want to delete and click the “Delete” button.

Step 4: To delete the font permanently, click the “Yes” button in the popup menu.

2. Using Windows Settings
Step 1: Open the Windows Settings from the Start menu.
Step 2: Select the “Personalization” tab from the left sidebar and click the “Fonts” button on the right pane.
Step 3: Single-click the font that you want to delete.

Step 4: From the drop-down menu, select the font face that you want to delete. In some cases you will not be required to select font face, so, skip to the next step.

Step 5: Click the “Uninstall” button.

Step 6: Again click the “Uninstall” button to uninstall the selected font permanently.

Sources to Download Fonts
Next Steps
We’ve covered how to install fonts in Windows 11. You can use any one of the methods listed above. Now, if you’re looking to manage various fonts in a single place, you can use external programs such as fonts manager.
To install or uninstall fonts in Windows. you can follow any one of the methods listed above.
Further, customize your computer by referring to the related articles below.
Related Articles

Change Cursor Design in Windows
Bored of looking at the same cursor? Learn how to change cursor style in Windows 11.
Hide System Tray Icons in Windows
Hide the bottom right icons on the taskbar for more organized icon placement and a cleaner taskbar.

Enable New Boot Animation in Windows 11
Still loading the old boot animation in Windows? Learn how to enable the new one.

Disable Animations in Windows 11
Increase the computer’s performance by disabling the animations and visual effects in Windows 11.
