Overview – Virtual Desktop in Windows 11
The Virtual Desktops is a productivity and management feature in Windows that allows users to create custom work environments by creating multiple desktops for various projects, especially when you need to manage them at the same time.
For example: You want to run a design tool for prototyping and a development tool for building. You can use virtual desktops to separate design assets and development kits for improved management.
Let’s breakdown what we’re going to cover in this article:
1. Create Virtual Desktops in Windows 11
Method 1: Create Virtual Desktops using “Task View”
Step 1: Click the “Task View” icon on the taskbar.
Step 2: Click the “+” icon at the bottom of the screen to create a new desktop.
Method 2: Create Virtual Desktop using Keyboard Shortcut
Step 1: On your keyboard, press the “Windows key + Tab” key combination.
Step 2: Click the “+” icon at the bottom of the window and a new desktop will be created.
Method 3: Create and directly switch to Virtual Desktop using Keyboard Shortcut
Step: To create and directly switch to the virtual desktop, press the “Ctrl + Windows key + D” key combination on the keyboard.
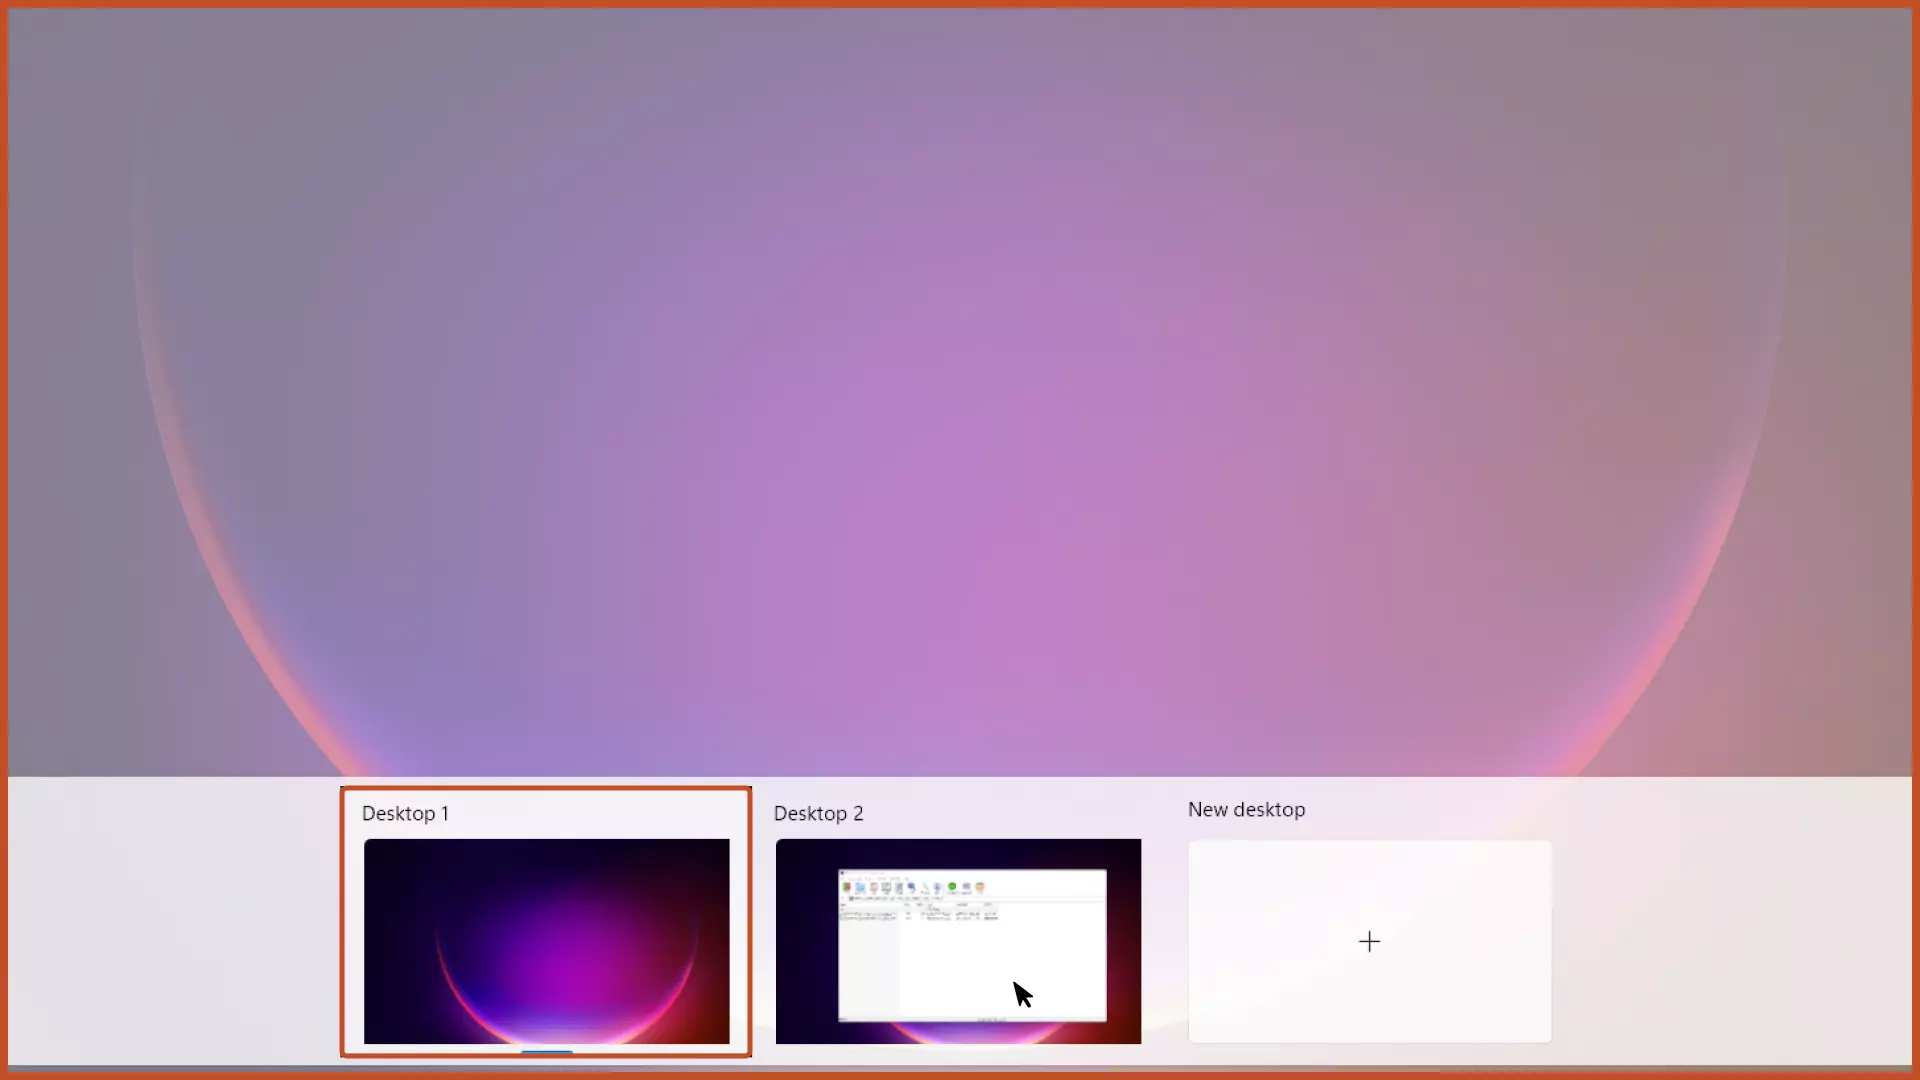
2. Navigate Between Virtual Desktops
Step: In the Task View, to switch between the virtual desktops, choose the desktop from the bottom tray.
3. Snap Window on Virtual Desktops
Step: Right-click the desktop that you want to snap on the screen. Depending on your requirements, select the “Snap Left” or “Snap Right” button.

4. Move Window between Multiple Monitors
Step 1: Connect to a multi-monitor setup using a VGA cable or HDMI, and open the Task View tab.
Step 2: Right-click the desktop that you want to move, hover over the “Move” button and select the monitor.
Note: This method is applicable only when you’re using a dual monitor or multi-monitor setup.
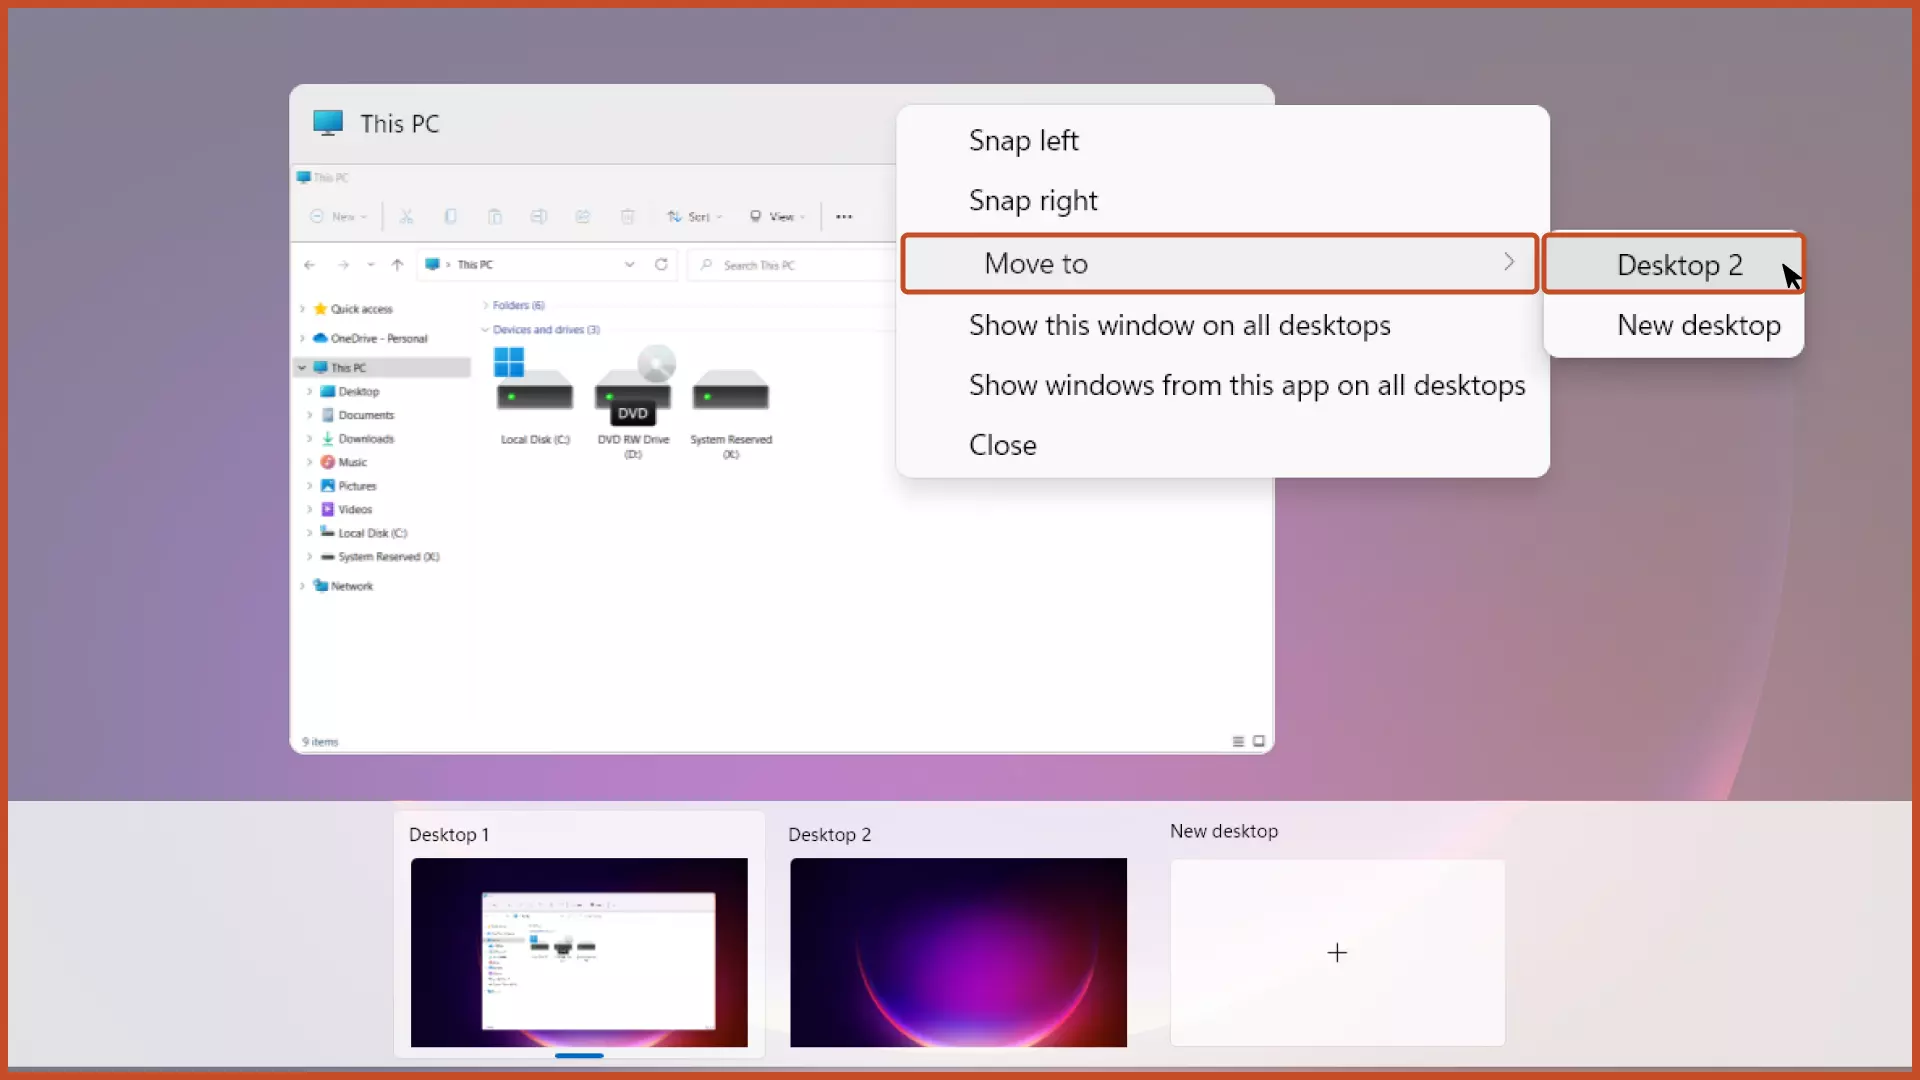
5. Open Same Program on Multiple Virtual Desktops
Sometimes you might need to open a same program on multiple virtual monitors. In this case, you can refer to the step below.
Step: In the Task View, right-click the The “Show this window on all desktops” option will show the selected window on all other virtual desktops and the “Show windows from this app on all desktops” option will show all running windows in a particular app. Select either one of these options.

6. Move App on Multiple Virtual Desktops
Step: In the Task View tab, single-click and drag the running application from one desktop and drop it to another virtual desktop.
6. Check All Running Apps on Virtual Desktops
Sometimes you’ll find too many applications running on various virtual desktops, and you might end up getting overwhelmed and confused. To prevent this scenario, you can see apps on other virtual desktops without changing the
Step: In the Task View tab, hover your cursor over another virtual desktop and you’ll see all running programs.
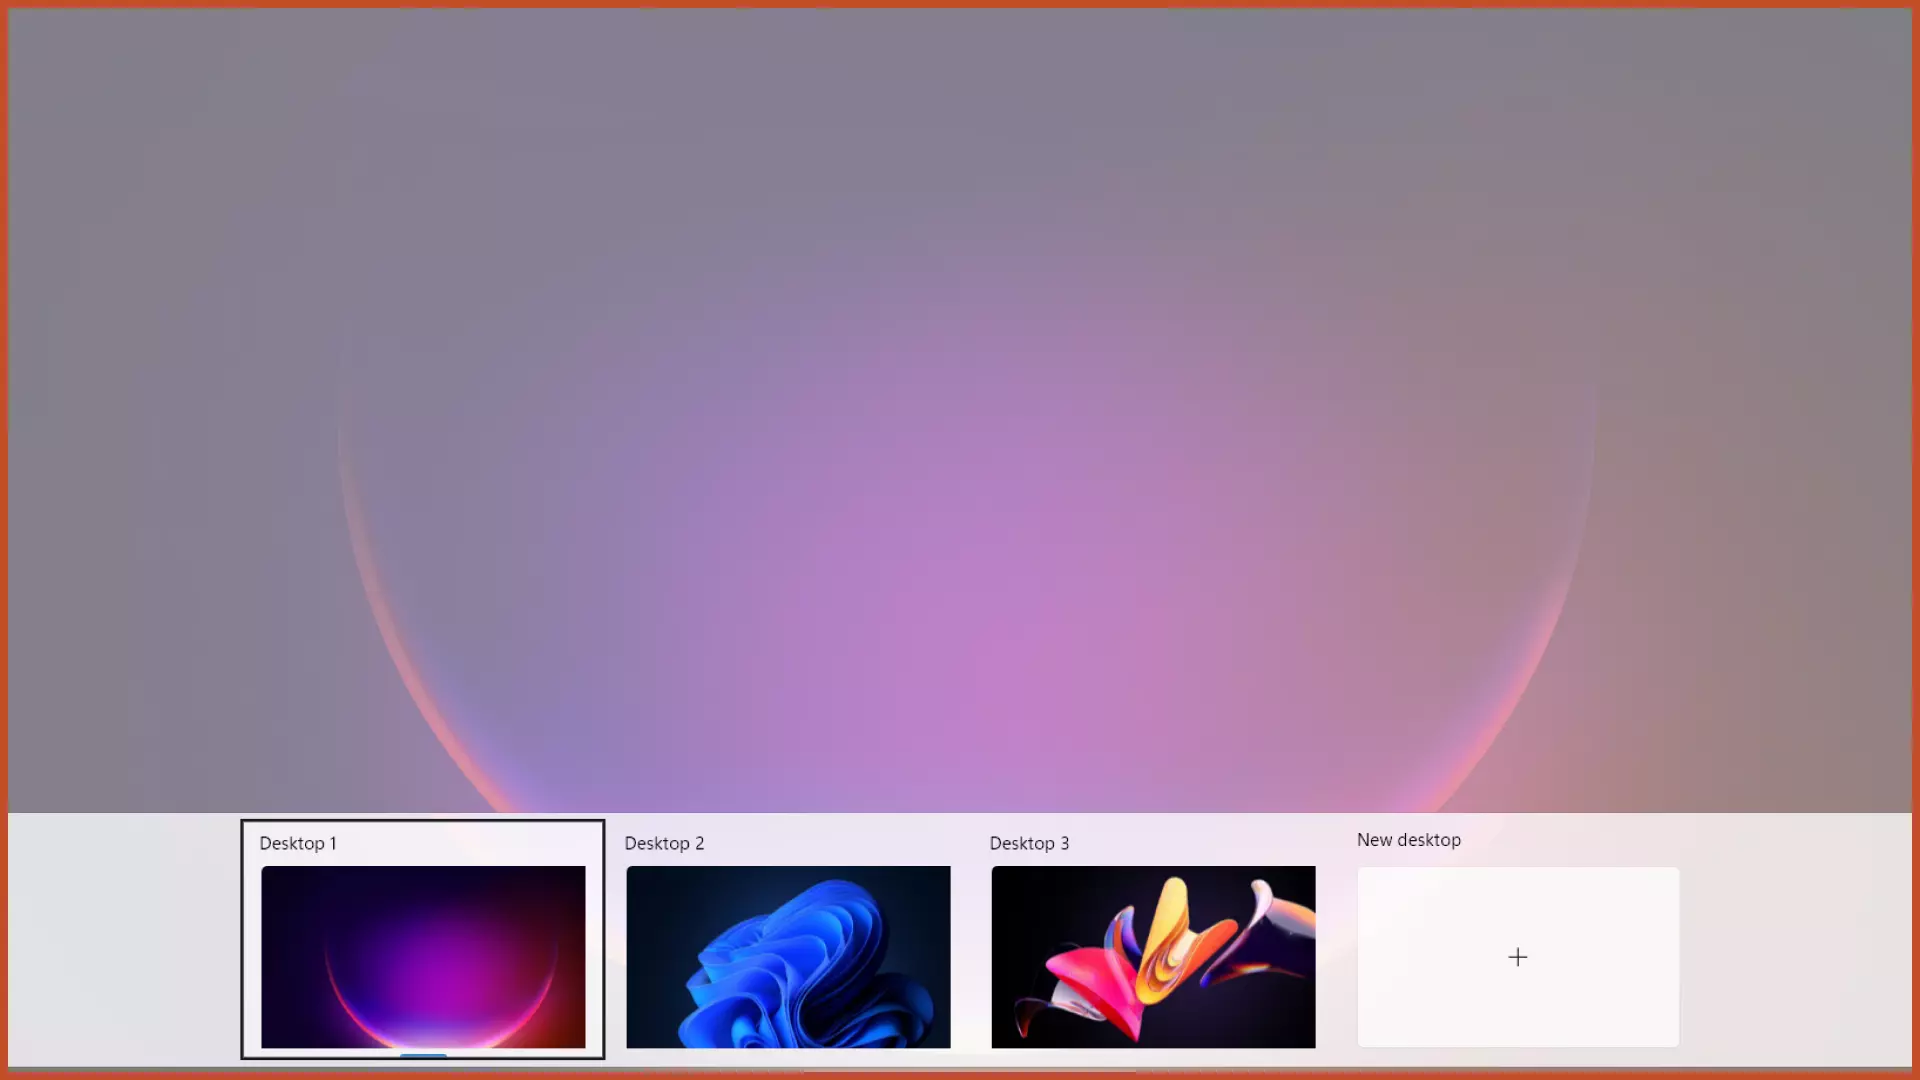
7. Change Virtual Desktop’s Background
To make the experience with the virtual desktops more convenient, you can change the background wallpaper to make them look distinct from each other and avoid confusion while navigating.
Step 1: In the Task View, right-click the virtual desktop and click the “Choose Background” option.
Step 2: You’ll be directed to the Windows Settings app. Choose the desired wallpaper and it will be saved.
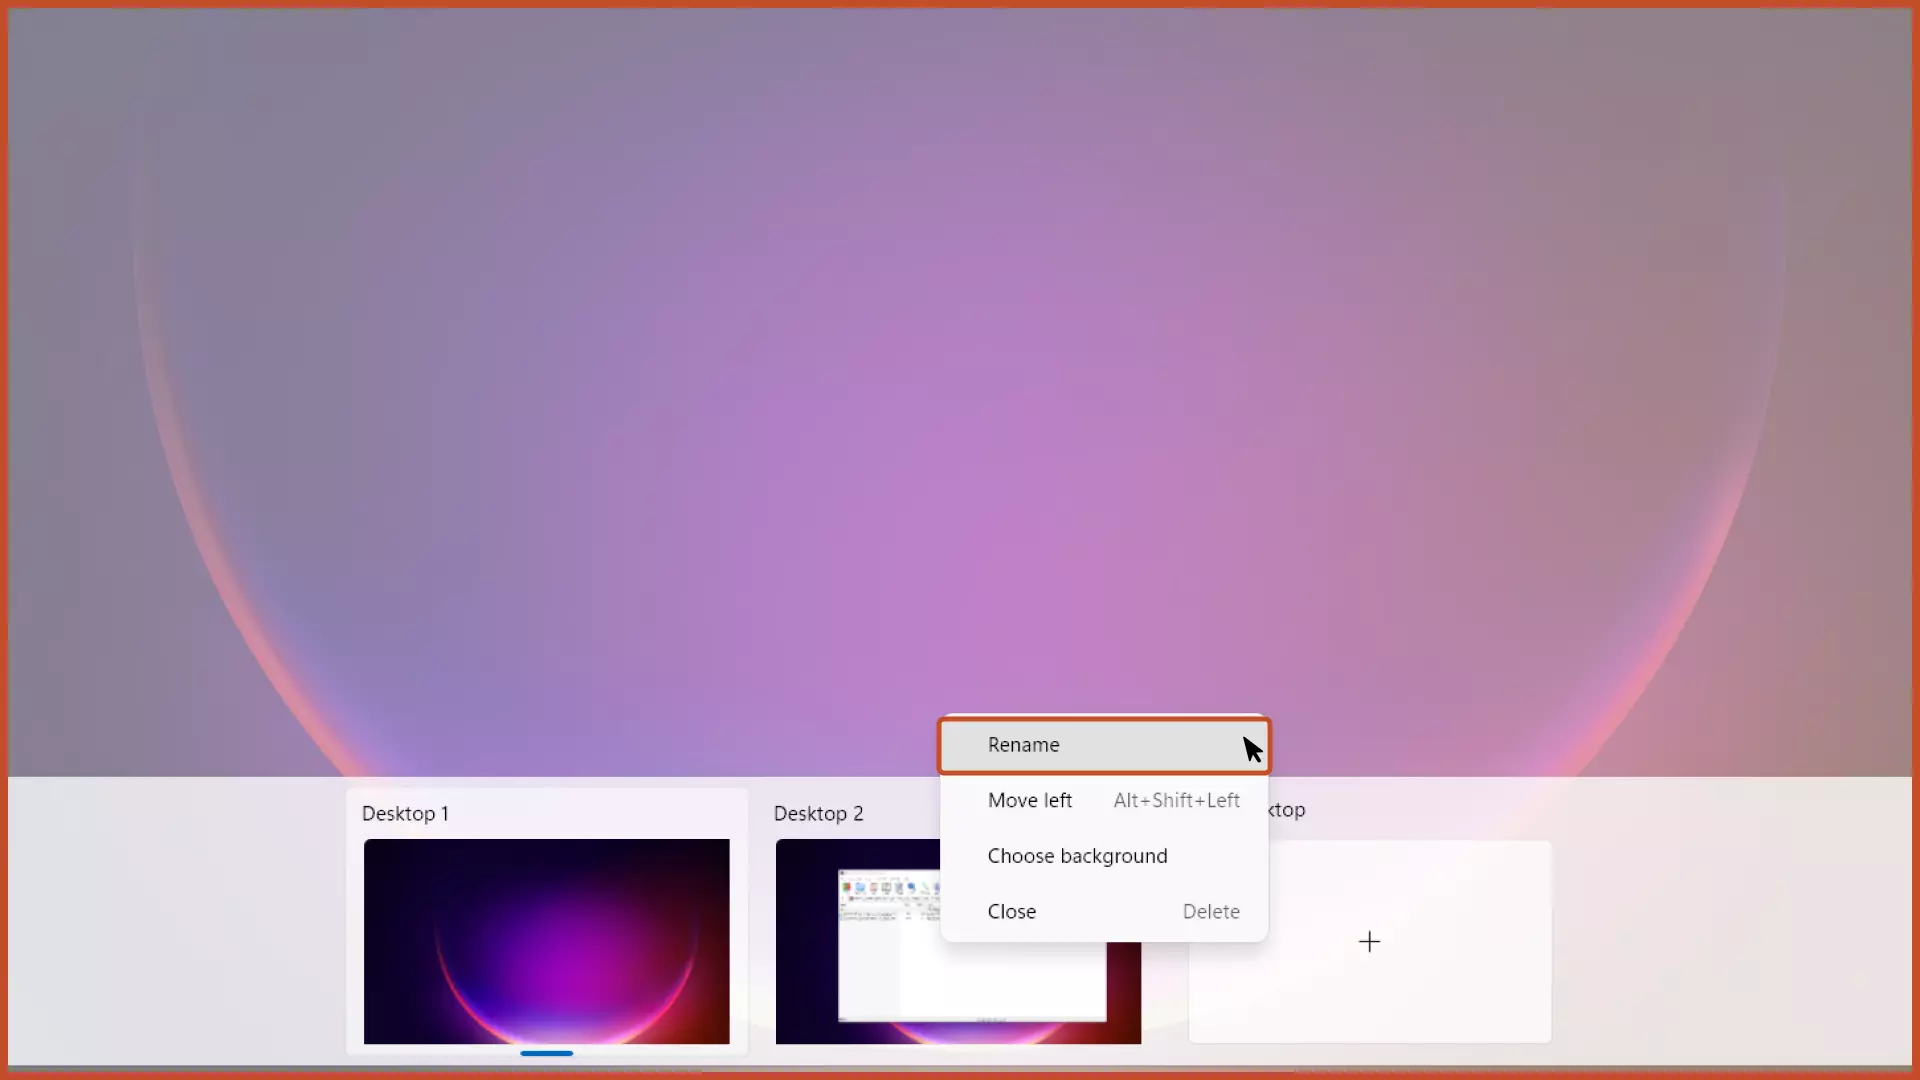
8. Rename Virtual Desktops
Step: Right-click the virtual desktop for which you want to change the name and click the “Rename” button.

9. Close Virtual Desktop
Step: In the Task View tab, click the “X” button to close other virtual desktops.

Usability Issues in Virtual Desktops
1. Minimizing App
When all of the virtual desktops are visible at once in the “Task View” section, it might be overwhelming and increase cognitive load. It would have been preferable if there was a way to minimize the virtual desktops.
2. Drag and Drop
Currently, it’s not possible to drag and drop the virtual desktops between multiple desktops. Incorporating the drag and drop feature will help users easily manage multiple desktops.
FAQs Related to Virtual Desktops
Does Virtual Desktops consume more memory in Windows?
Virtual Desktops don’t often use a lot of memory, CPU or other resources. However, running programs on virtual desktops consumes the same amount of hardware resources as running them on a regular desktop environment.
Next Steps
We’ve covered how to use virtual desktops in Windows 11 on both single monitor and multi-monitor setups.
Virtual desktop technology isn’t new, it’s actually been around for some time. This technology has been used in most operating systems for many years, and having multiple desktops has become a standard feature of all operating systems. With the introduction of Windows 11, Microsoft has made significant improvements to desktop virtualization in terms of user interface, asthetics, flexibility and ease of use.
Improve your workflow and productivity by referring to the related articles below.
Related Articles
Set Up Dual Monitors in Windows 11
Setup the dual monitors to improve productivity and utilize the virtual desktop features designed for it.
Calibrate Monitors in Windows 11
Customize you monitor’s colors, contrast, RGB and gamma ratios.

Allocate More RAM in Windows 11
Improve the memory management and allocate more RAM to specific apps for better performance.
