
Overview – Change Computer Name in Windows
The Computer Name is used to recognize other computers on a network and identify BlueTooth, Hotspot, and other connections using the host’s name (computer name).
Once the computer name is assigned, and Bluetooth is turned on, the same device name will be displayed. It’s difficult to recollect the random name assigned to the device, so it’s always recommended to assign it a simple and easy name.

It appears that you messed up while installing Windows 11 by assigning your computer an arbitrary name and now you want it to be corrected. By the end of this article, you’ll be able to rename your computer:
1. Rename PC using Windows Settings
Step 1: Open the Windows Settings from the Start menu or press the “Windows logo key + I” key combination on the keyboard.

Step 2: Select the ‘System‘ option from the left sidebar, scroll and click the ‘About‘ option.

Step 3: Click the “Rename this PC” option and a dialog box will appear.

Step 4: Enter the new PC name that you want to be displayed.

Step 5: Restart your device to make changes take effect.

2. Rename PC using Command Prompt (CMD)
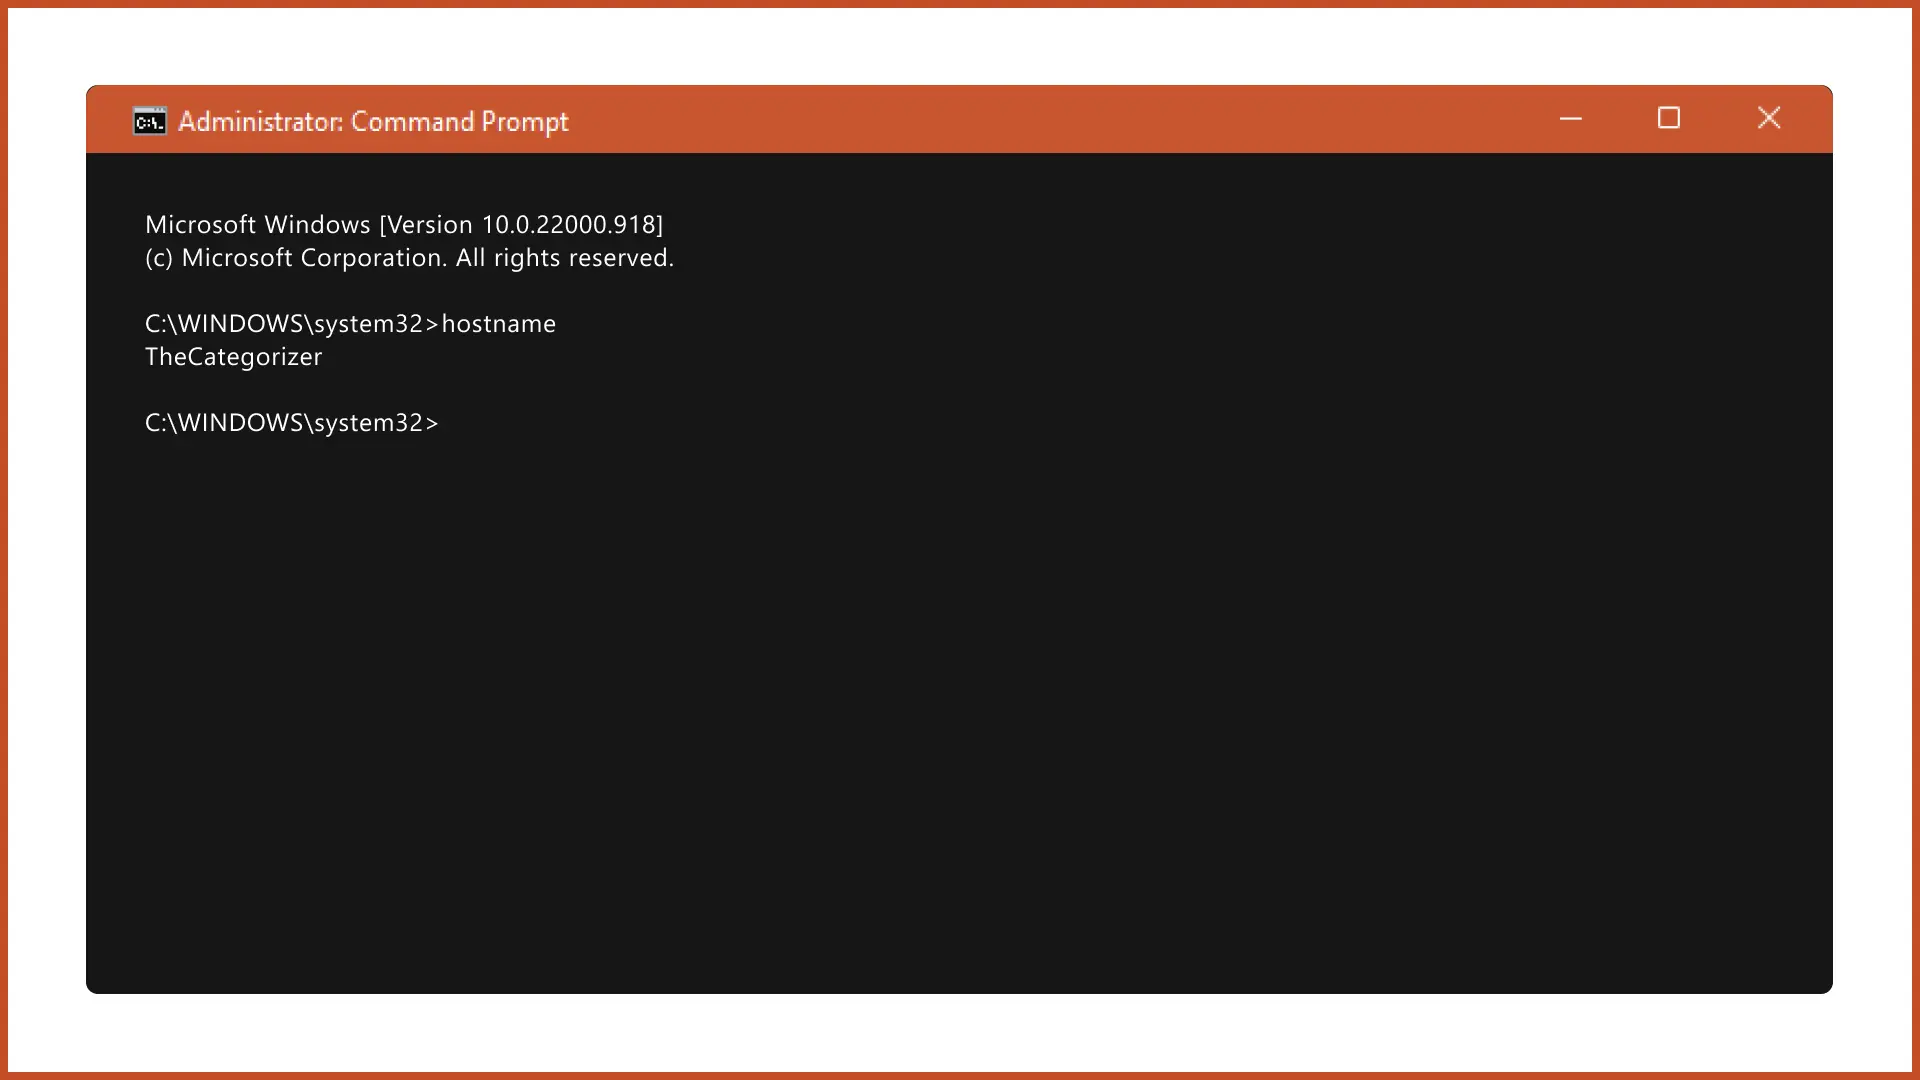
Step 1: Run the Command Prompt as an administrator from the Start menu.
Step 2: To show the current PC name, type the command: hostname.
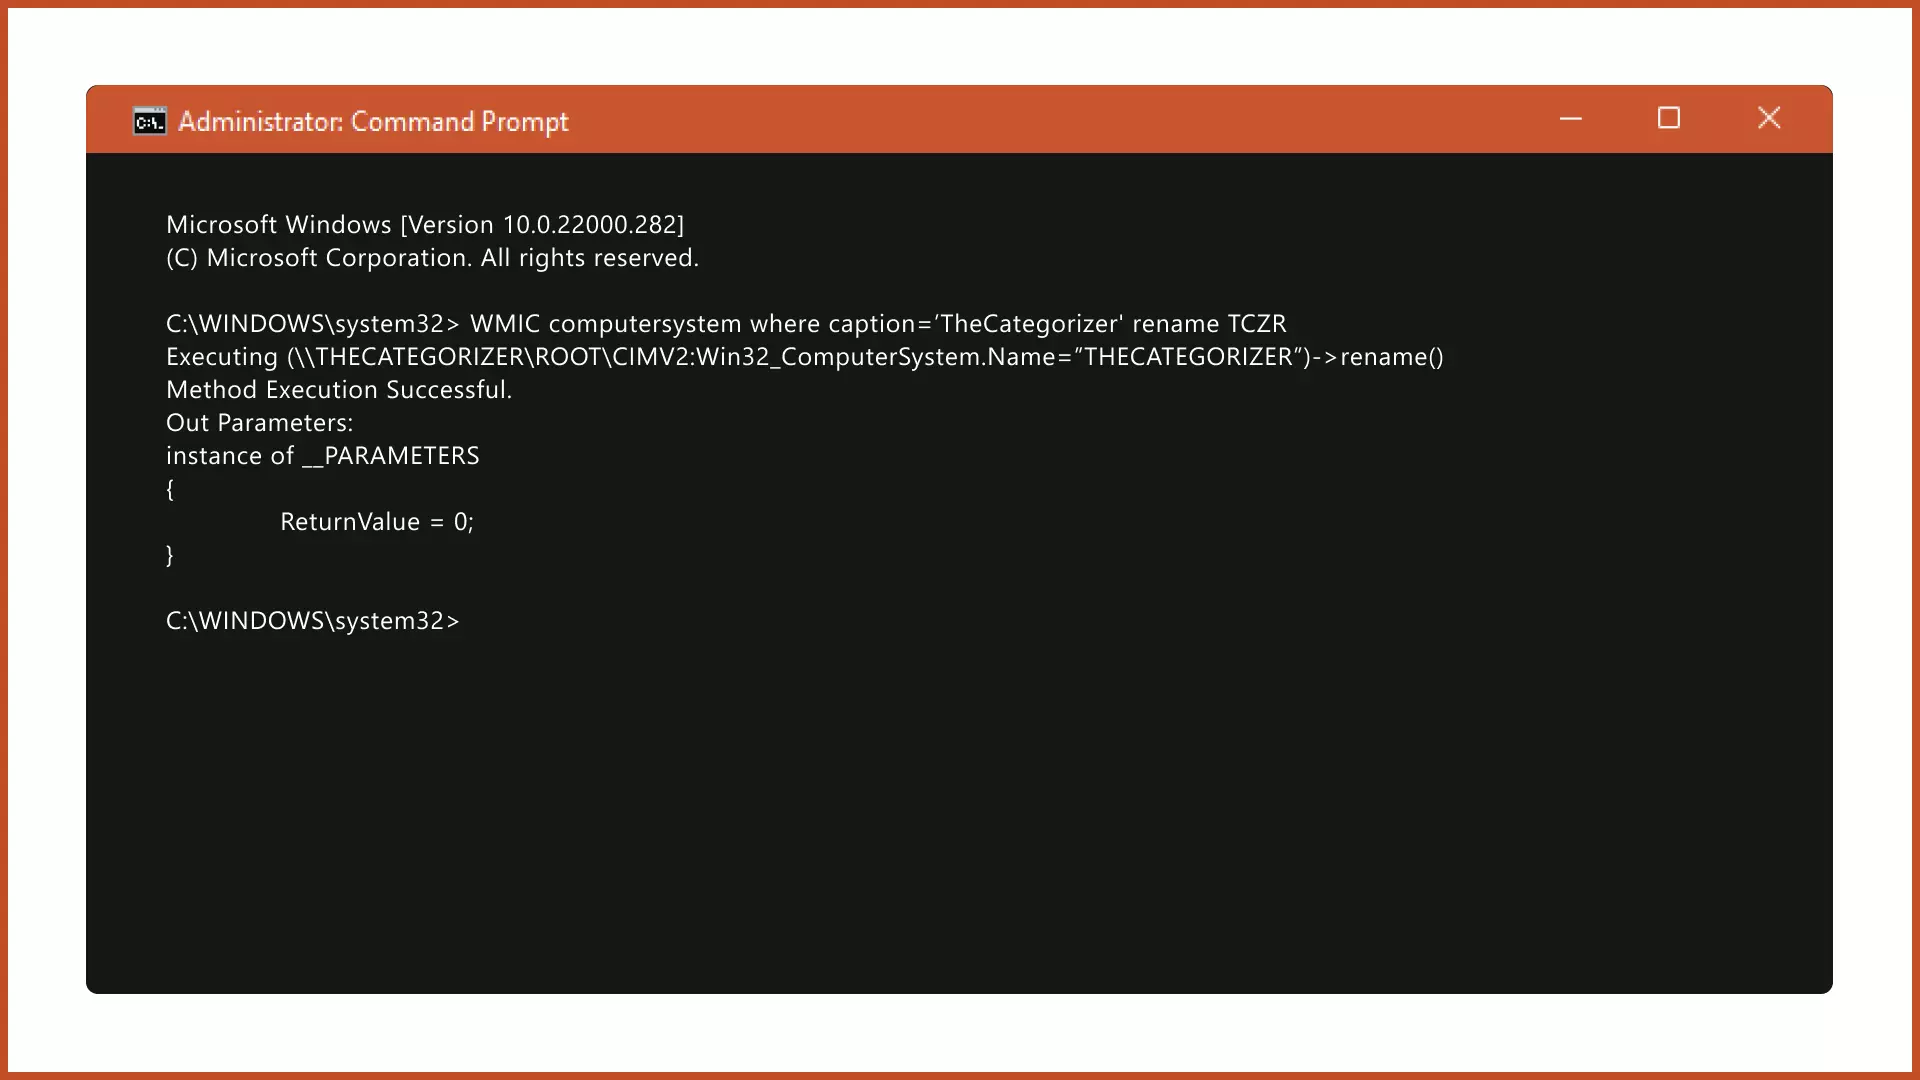
Step 3: Copy and Paste the following command to and replace the current_pc_name with your device’s current name obtained from the previous command (in step 2) and new_pc_name with the new name.
WMIC computersystem where caption=’current_pc_name’ rename new_pc_name
Step 4: Restart your computer to make the changes take effect.
3. Rename PC using Control Panel
Step 1: Open the Control Panel from the Start menu.
Step 2: In the search bar, search for “Rename“, select the “Rename this Computer” option, and click the “Change” button.

Step 3: Add the new Computer name and press the “OK” button.

Step 4: Restart your device to make changes take effect and the next time you log in to your device, the new name will be displayed.
4. Rename PC using PowerShell
Step 1: Run the PowerShell as an administrator from the Start menu.
Step 2: Copy and Paste the following command and Replace the PC Name with the new name you wish to assign to the computer, and also replace LocalUsername with a local user account name.
Rename-Computer -NewName PCName -LocalCredential LocalUsername -PassThru
Step 3: Restart your computer to make changes take effect properly.
Conclusion
In this article, we’ve covered how to change the computer name in Windows 11. There’s no specific limit on how many times we can rename the computer. We may rename the PC at any moment based on our requirements.
Do remember that when you alter the computer’s name and switch on the Bluetooth or hotspot, your device will be visible to other devices by the computer name you’ve set.
Related Articles

Change Account Username in Windows
Have you randomly set the account name for your primary machine? Learn how to change the account name in Windows.

Find Product Key in Windows 11
Perform a security check whether or not your version of Windows is totally original or not.

How To Hide Taskbar in Windows
Hide the taskbar in Windows when not in use and increase your screen size by some extra pixels.

Completely Clear Cache in Windows
Clear up the cache in Windows to free up some storage on your computer and ensure that the webpages you’re visiting are up-to-date.
