
Overview – Limit Bandwidth in Windows 11
The frequency at which a bandwidth-intensive device (a server) receives data or the speed (in B/KBps) of each data response is limited (throttled) by bandwidth throttling. If these constraints are not in place, the device’s processing capacity may be exceeded.
When assessing the price for new consumers, services like Netflix and Hulu considers how their users utilize bandwidth. Although this is inconvenient for customers, it makes sense from a company’s standpoint since using a limitless amount of bandwidth would raise acquisition costs, infrastructure expenses, and so on. These businesses are attempting to price their services such that the number of customers does not exceed the available bandwidth, which would degrade the user experience.
It seems that you don’t want to waste your internet data by consuming excessive bandwidth on your computer. Once you set a specific bandwidth for your computer, the internet data usage measured by your device and service provider may differ.
By the end of this article, you’ll be able to set bandwidth limit for applications in Windows 11:
1. Limit Bandwidth using Windows Settings
Step 1: Connect to the internet connection for which you want to limit the bandwidth.
Step 2: Open the Windows Settings from the Start menu.

Step 2: Select the “Network & Internet” option Depending on your network, select the Wi-Fi or Ethernet option.
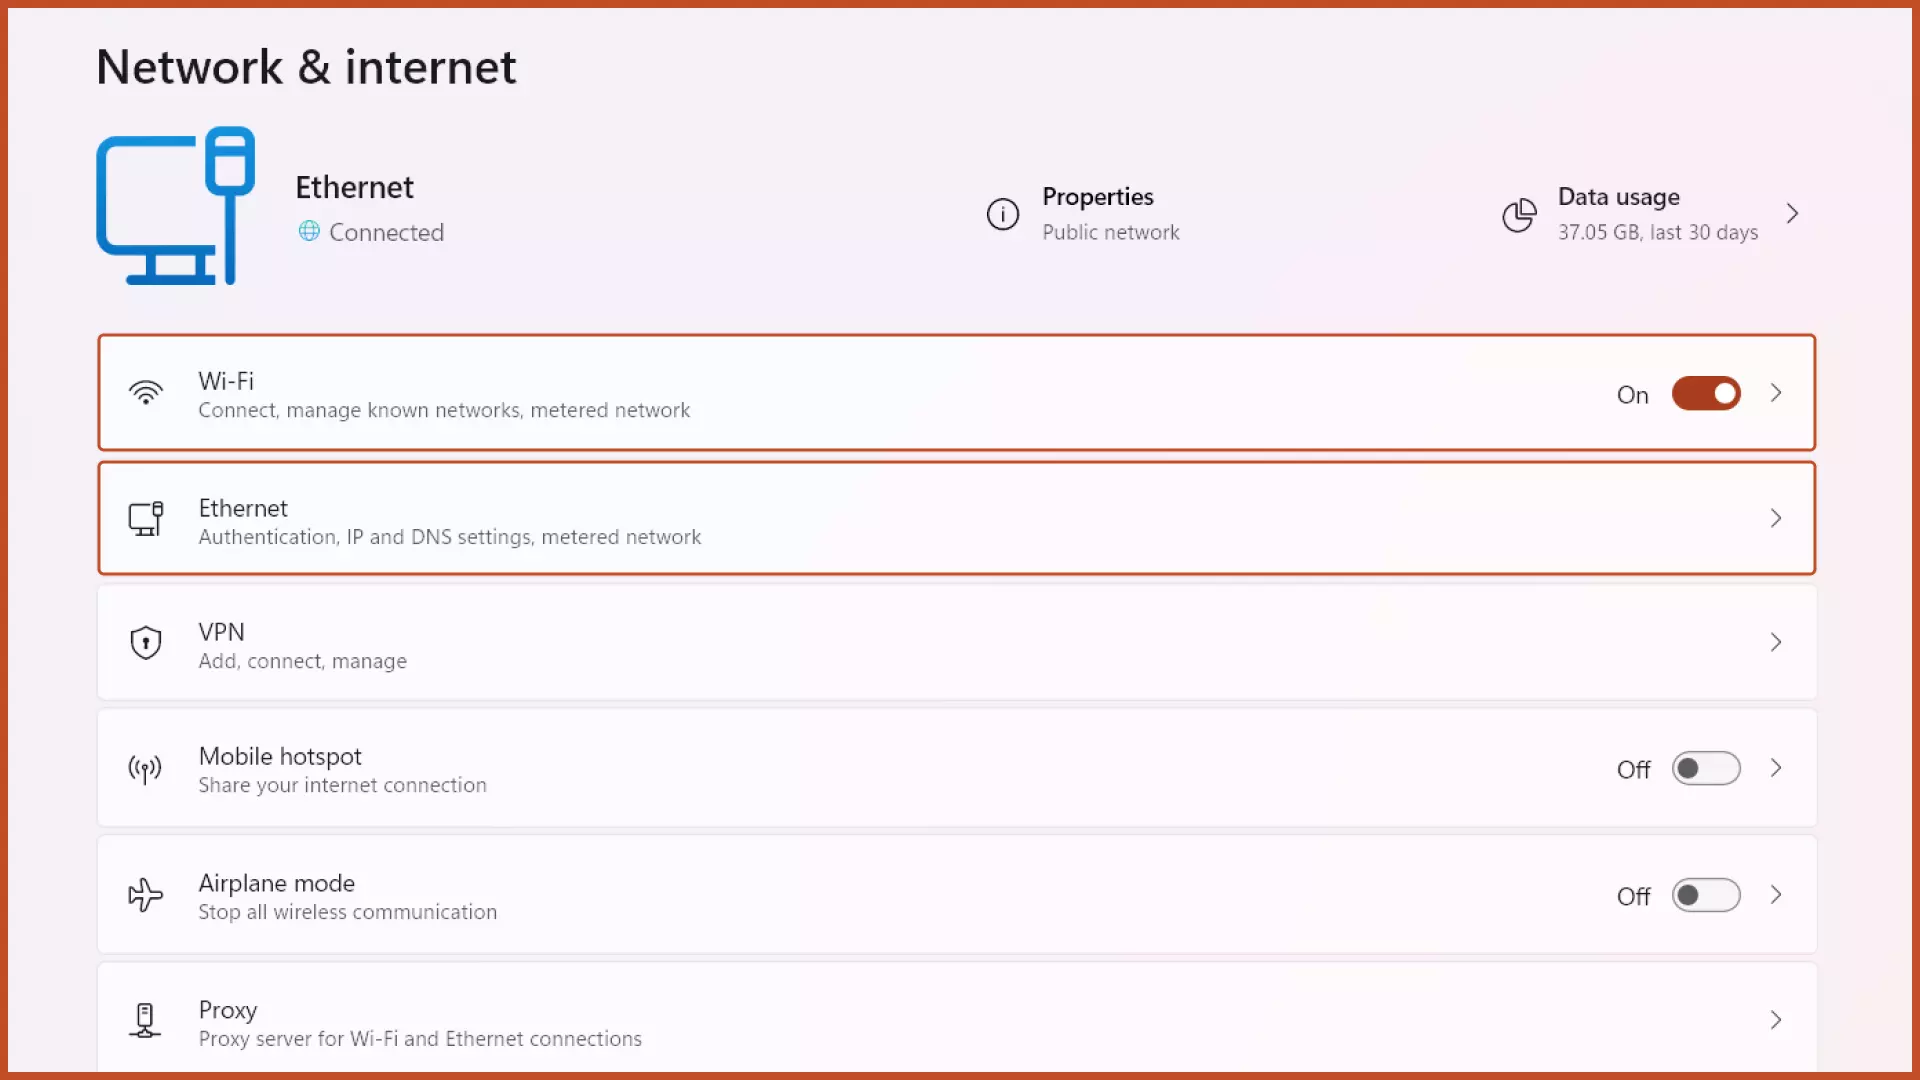
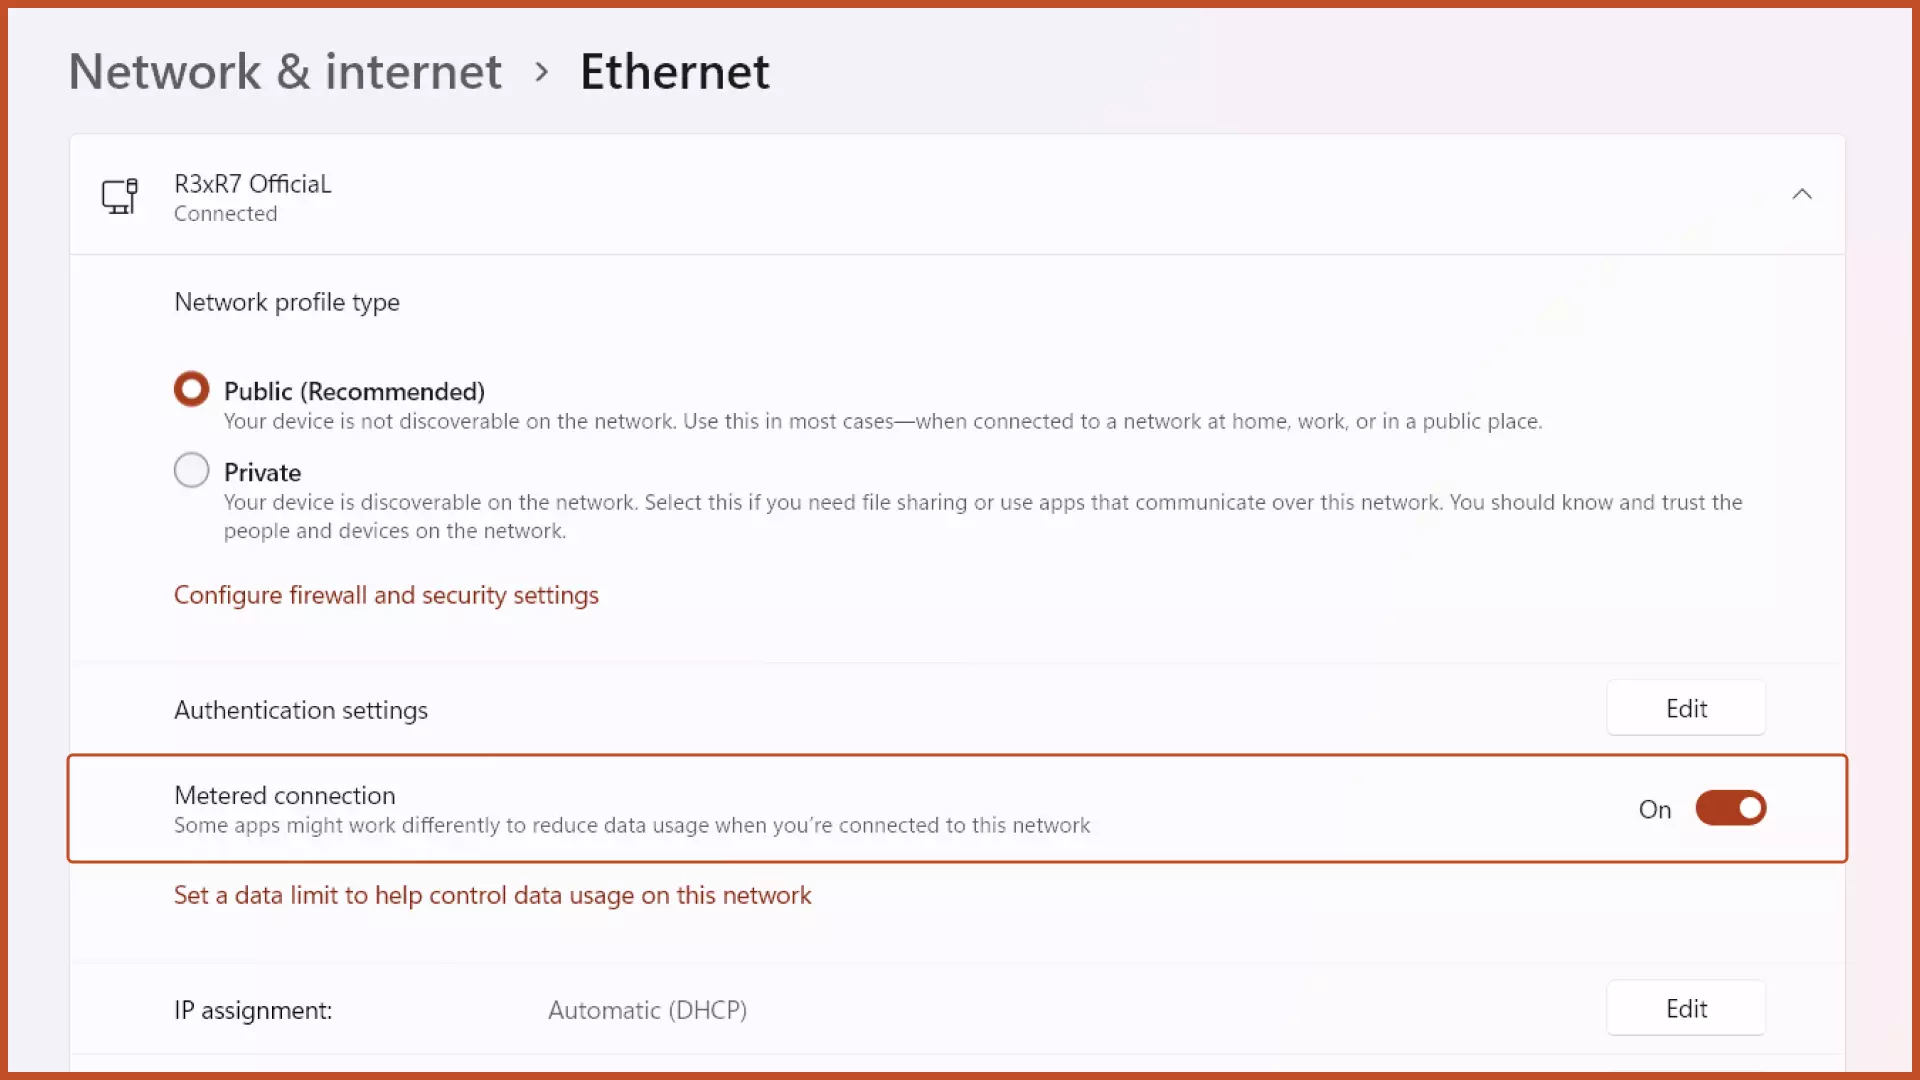
Step 3: Toggle on the “metered connection” option.
2. Limit Bandwidth using Registry Editor
Step 1: In the Start menu, type “Registry Editor” and open the program or press the “Windows + R” key combination to open Windows Run, type “regedit” and hit the enter key.
Step 2: Navigate to the following path:
Computer\HKEY_LOCAL_MACHINE\SOFTWARE\Policies\Microsoft\Windows.
Step 3: Right-click the Windows key and add a new key named Psched.
(“Psched” key is pre-built on some computers)
Step 4: Right-click the empty area on the right pane and add a new DWORD (32-bit) value named NonBestEfforLimit.
(“NonBestEfforLimit” DWORD Value is pre-built on some computers)
Step 5: In the value data field, input the bandwidth limit (in percentage) between 1 to 100.
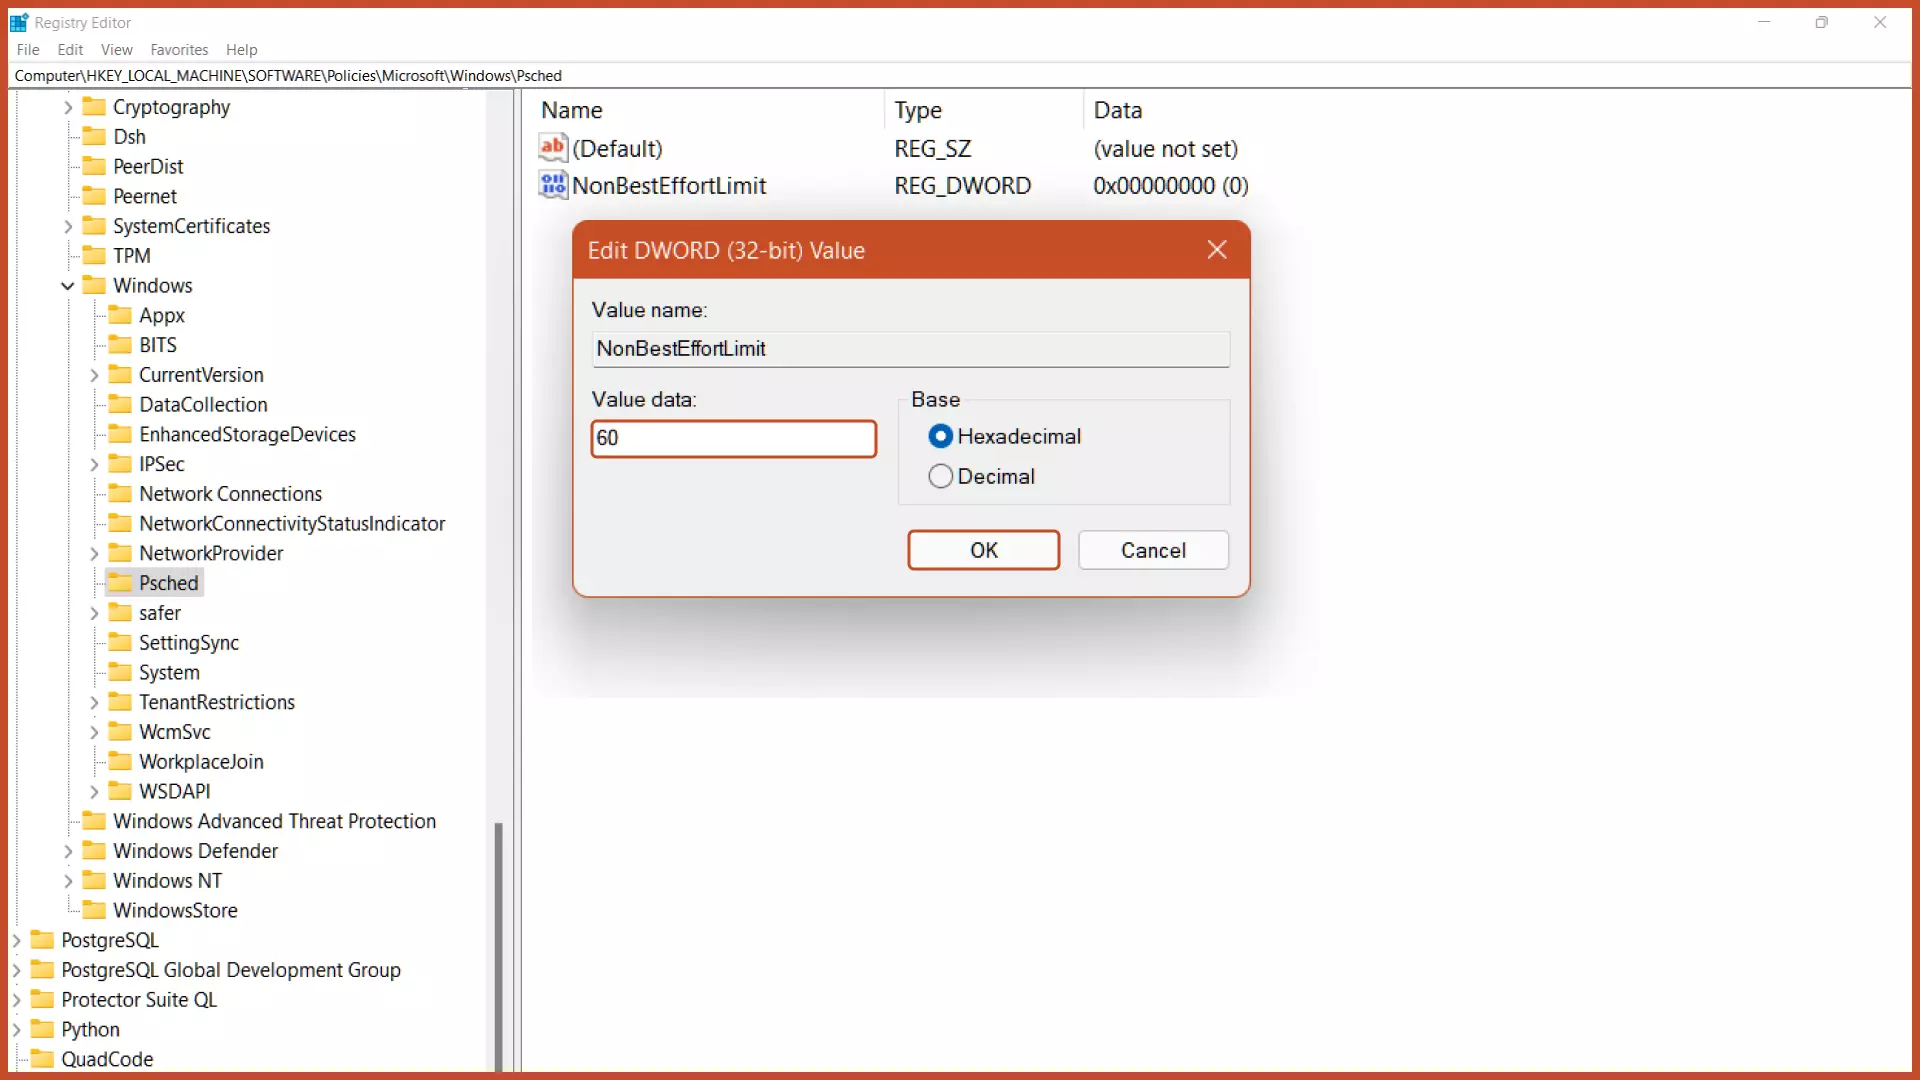
Note: To turn off the bandwidth limit using the registry editor, set the value data to 0.
3. Limit Bandwidth using Group Policy Editor
Step 1: In the Start menu, type “Edit Group Policy” (without quotation marks) and hit the enter key.
Step 2: Navigate to the following path:
Computer Configuration > Administrative Templates > Network > QS Packet Scheduler and double-click the “Limit reservable bandwidth” option on the right pane.

Step 3: To limit bandwidth, check the “Enabled” option and set the Bandwidth limit (in percentage) between 1 to 100.

Note: To turn off the bandwidth limit, set the value data to 0 and set the bandwidth limit status to “Enabled“.
Suggested Article: Myths of Limiting Reservable Bandwidth.
4. Limit Bandwidth using Router
Many companies such as Cisco, NetGear, and TP-Link offer built-in network monitoring and throttling features that you can use to manage bandwidth on your network without configuring the Windows default settings. Depending on your needs you can limit bandwidth for all connected devices or specific devices on the network. Simply check on Google whether or not your router supports the network management and monitoring features.
5. Limit Bandwidth using Third Party Tools
Tool 1: T-Meter
T-Meter is a tool used to monitor network traffic, bandwidth, data transfer between server and client, window domain authentication, traffic shaping (speed control), traffic reports, packet filtering, DNS Server forwarding, built-in DHCP (Dynamic Host Configuration Protocol) Server, etc.
Type: Freeware
Tool 2: Net Peeker
Net Peeker is tested and compatible with Windows 11. The main features include network traffic monitoring, desktop-based firewall, network speed limitation, traffic shaping (speed control), malware protection, network traffic analysis, network traffic capture, stored logs, etc.
Type: Shareware (30 Day Trial Period)
Next Steps
We’ve covered how to set bandwidth limit in Windows 11. Depending on your requirements, you can use any one of the methods listed above.
If you’re restricting bandwidth to improve download and upload speeds, several other aspects are taken into account, including packets received and delivered, compatibility of your computer’s hardware and router, network congestion, and your ISP’s backend infrastructure, among others. So, even after liming the bandwidth, you cannot be fully assured that your internet will work faster in terms of downloading and uploading.
Further, customize your Windows built-in settings by referring to the related articles below.
Related Articles

How To Check Data Usage in Windows 11
Check the current data usage and reset it to compare the differences before and after saving the bandwidth on your computer.
How To Change DNS Server in Windows 11
Improve your internet speed by configuring the DNS settings of your computer and shifting to a faster DNS server.

Enable or Disable DHCP on Windows 11
Dynamically set your computer’s IP automatically rather than assigning on your own using the Dynamic Host Configuration Protocol in Windows.
