Overview – BitLocker Drive Encryption
BitLocker Encryption is a means of using an encryption key to secure sensitive data on your drive in Windows. Encryption ensures that only authorized users have access to data stored on an encrypted volume, which is especially beneficial for portable laptops or workspaces. If you’ve more than one OS on your system, the BitLocker ensures that all the drives are encrypted to prevent data leakage to other users or attackers.
You appear to no longer require BitLocker encryption on the drive, or you wish to totally turn off BitLocker Service in Windows. There are 2 types of BitLocker in Windows: Device Encryption and Drive Encryption. This article is mainly focused on Disabling Drive Encryption. By the end of this article, you’ll be able to disable BitLocker Drive Encryption in Windows 11:
NOTE: Windows 11 Home Edition doesn’t include the Bitlocker Encryption (Drive Encryption, but supports Device Encryption). Therefore, if you are currently running Windows 11 Home, it would be best not to waste your valuable time looking into this. Although, feel free to explore in order to widen your knowledge.
BitLocker System Requirements
1 TPM Version 1.2 or Greater
It’s recommended to have TPM installed on your computer’s hardware. In case your computer doesn’t have TPM, enabling the BitLocker needs you to save a startup key or any removable device such as USB Flash Drive.
2. BIOS or UEFI Firmware with USB Mass Storage Support
To enable BitLocker, your computer must either support BIOS or UEFI Firmware supporting USB Mass Storage (I/O Operations).
3. TWO or MORE HARD DISK PARTITIONS
The computer must have 2 or more hard disk partitions formatted with NTFS File System on BIOS or FAT32 on UEFI-based Firmware with a minimum of 350 MB of space allocated for Bitlocker.
Check BitLocker Status
Step 1: Open the Command Prompt from the Start menu.
Step 2: To check BitLocker status, type the command:
manage-bde -status.
Step 3: When the Protection Status is set to “Protection Off”, BitLocker is disabled for that drive. However, if BitLocker is enabled for the drive, the Protection Status will be set to “Protection Onn”.

1. Turn off BitLocker via Control Panel
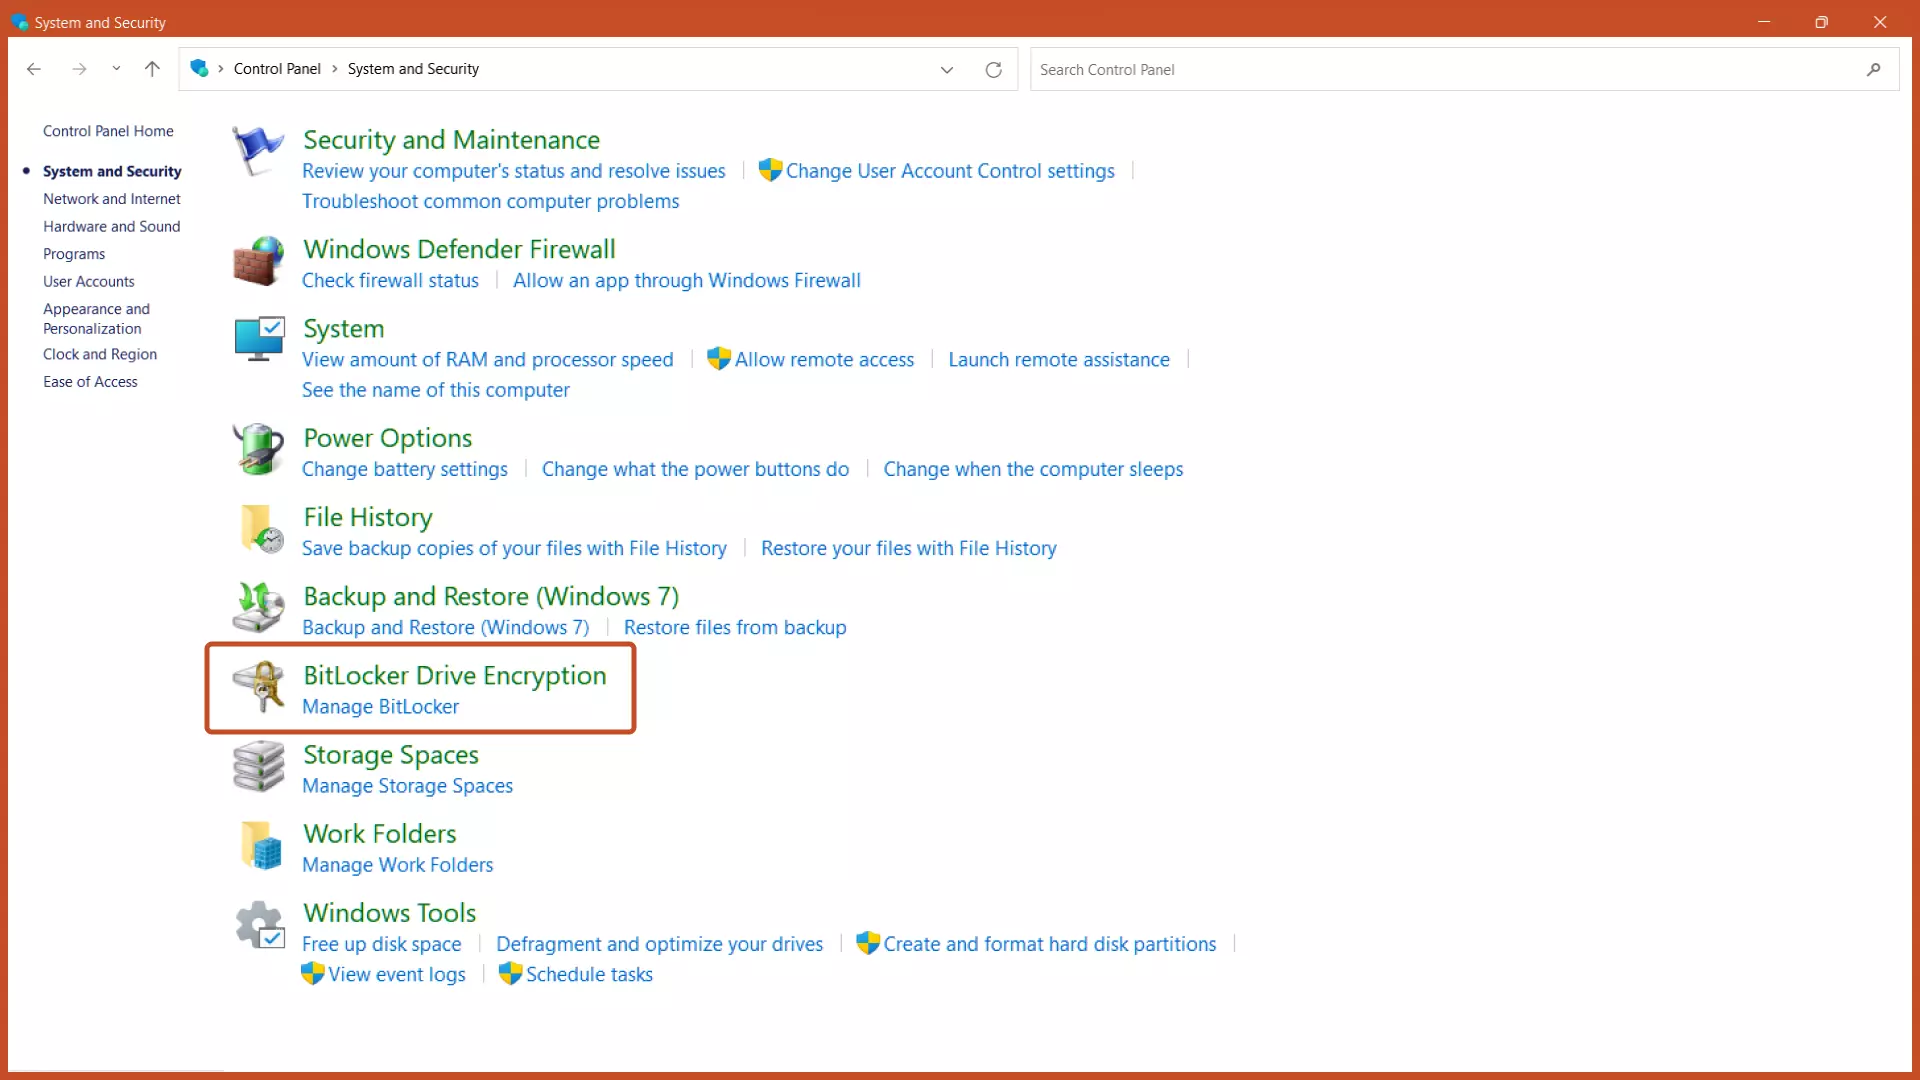
Step 1: Open the Control Panel from the Start menu and click the “System and Security” option.
Step 2: Click the “BitLocker Drive Encryption” Button.
Step 3: Click the “Turn off BitLocker” button.

2. Disable BitLocker via Windows Services
Step 1: Press the “Windows key + R” key combination on your keyboard to open Windows Run, type “services.msc” (without quotation marks) and press the “OK” button.
Step 2: Scroll and double-click the “BitLocker Drive Encryption Service” option.

Step 3: To disable BitLocker encryption, set the startup type to “Disabled” and press the “Apply” button.

Step 4: Restart your computer to make changes take effect.

3. Turn off BitLocker via “This PC”
Step 1: Open the “This PC” app on your computer.
Step 2: Right-click the drive for which you want to disable BitLocker and select the “Manage BitLocker” option.

Step 3: Click the “Turn off BitLocker” button.
4. Disable BitLocker via System Configuration
Step 1: Open the Windows RUN by pressing the “Windows key + R” key combination, type: msconfig, and hit the enter key.
Step 2: Select the “Services” tab from the top bar, uncheck the BitLocker Drive Encryption Service and click the “Apply” button.

Step 3: Restart your computer and the next time, the BitLocker Encryption Service will be disabled.
5. Turn off BitLocker via Command Prompt
Step 1: Run the Command Prompt as an administrator from the Start menu.
Step 2: To unlock the BitLocker Encrypted Drive, type the command:
manage-bde -unlock Drive-Name: -RecoveryPassword Recovery-Code.

Step 3: To disable BitLocker using CMD, type the command: manage-bde -off Drive-Name:

Note: Replace the Drive-Name with the Drive Letter of BitLocker Encrypted Drive and Recovery-Code with the actual recovery key allotted while encrypting the drive.
6. Disable BitLocker via Registry Editor
Step 1: Open the Registry Editor from the Start menu.
Step 2: In the Registry Editor, navigate to the following path:
Computer\HKEY_LOCAL_MACHINE\SYSTEM\CurrentControlSet\Control\BitLocker.
Step 3: Right-click the empty area on the right pane, add a new DWORD (32-bit) value and name it as PreventDeviceEncryption.

Step 4: Open the DWORD value and set the value data from 0 to 1 in hexadecimal format and click the “OK” button.

Step 5: Restart the computer to make changes take effect.
7. Turn off BitLocker via PowerShell
Step 1: Run the PowerShell as an administrator from the Start menu.
Step 2: To disable BitLocker using PowerShell, type the command: Disable-BitLocker -MountPoint Drive_Name:

Note: Replace the Drive_Name with the Drive Letter of BitLocker encrypted drive.
8. Turn off BitLocker via Group Policy Editor
Step 1: In the Start menu, type: Group Policy Editor and hit the enter key.
Step 2: Navigate to the following path:
Computer Configuration > Administrative Templates > Windows Components > BitLocker Drive Encryption > Removable Data Drives and double-click the “Control use of BitLocker on removable drives” option.

Step 3: Select the “Disabled” option and click the “OK” button.

This policy setting controls the use of BitLocker on removable data drives. This policy setting is applied when you turn on BitLocker.
If you do not configure this policy setting, users can use BitLocker on removable disk drives. If you disable this policy setting, users cannot use BitLocker on removable disk drives.
Next Steps
We’ve covered how to Disable BitLocker Encryption in Windows 11 and how to turn off BitLocker Encryption for any particular drive. You can choose any of the methods that you find convenient to follow.
Further, configure the computer’s settings to customize it depending on your preferences.
Related Articles
Run Troubleshooters in Windows 11
Fix frequently occurring related issues related to drivers and hardware using the built-in Windows troubleshooter.

How To Create a Restore Point on Windows 11
Create a restore point in Windows to restore the stable version if something goes wrong while configuring built-in Windows settings.
Credential Manager in Windows
Manage all the stored passwords On your computer using the built-in Windows Credential Manager.
