
Overview – Change Mouse Speed in Windows
It looks that the speed of your mouse pointer is either too slow or too fast for you and you’re want to increase your productivity and comparatively faster workflow by adjusting the cursor speed as per your preference.
By default, the mouse pointer speed is set to slow from the manufacturing end. However, it’s possible to adjust the cursor speed based on your needs.
By the end of this article, you’ll be able to adjust the mouse pointer speed in Windows:
1. Using Windows Settings
Step 1: Open the Windows Settings from the Start menu or press the “Windows key + I” key combination on the keyboard.

Step 2: Select the “Bluetooth & Devices” option from the left sidebar and click the “Mouse” option.
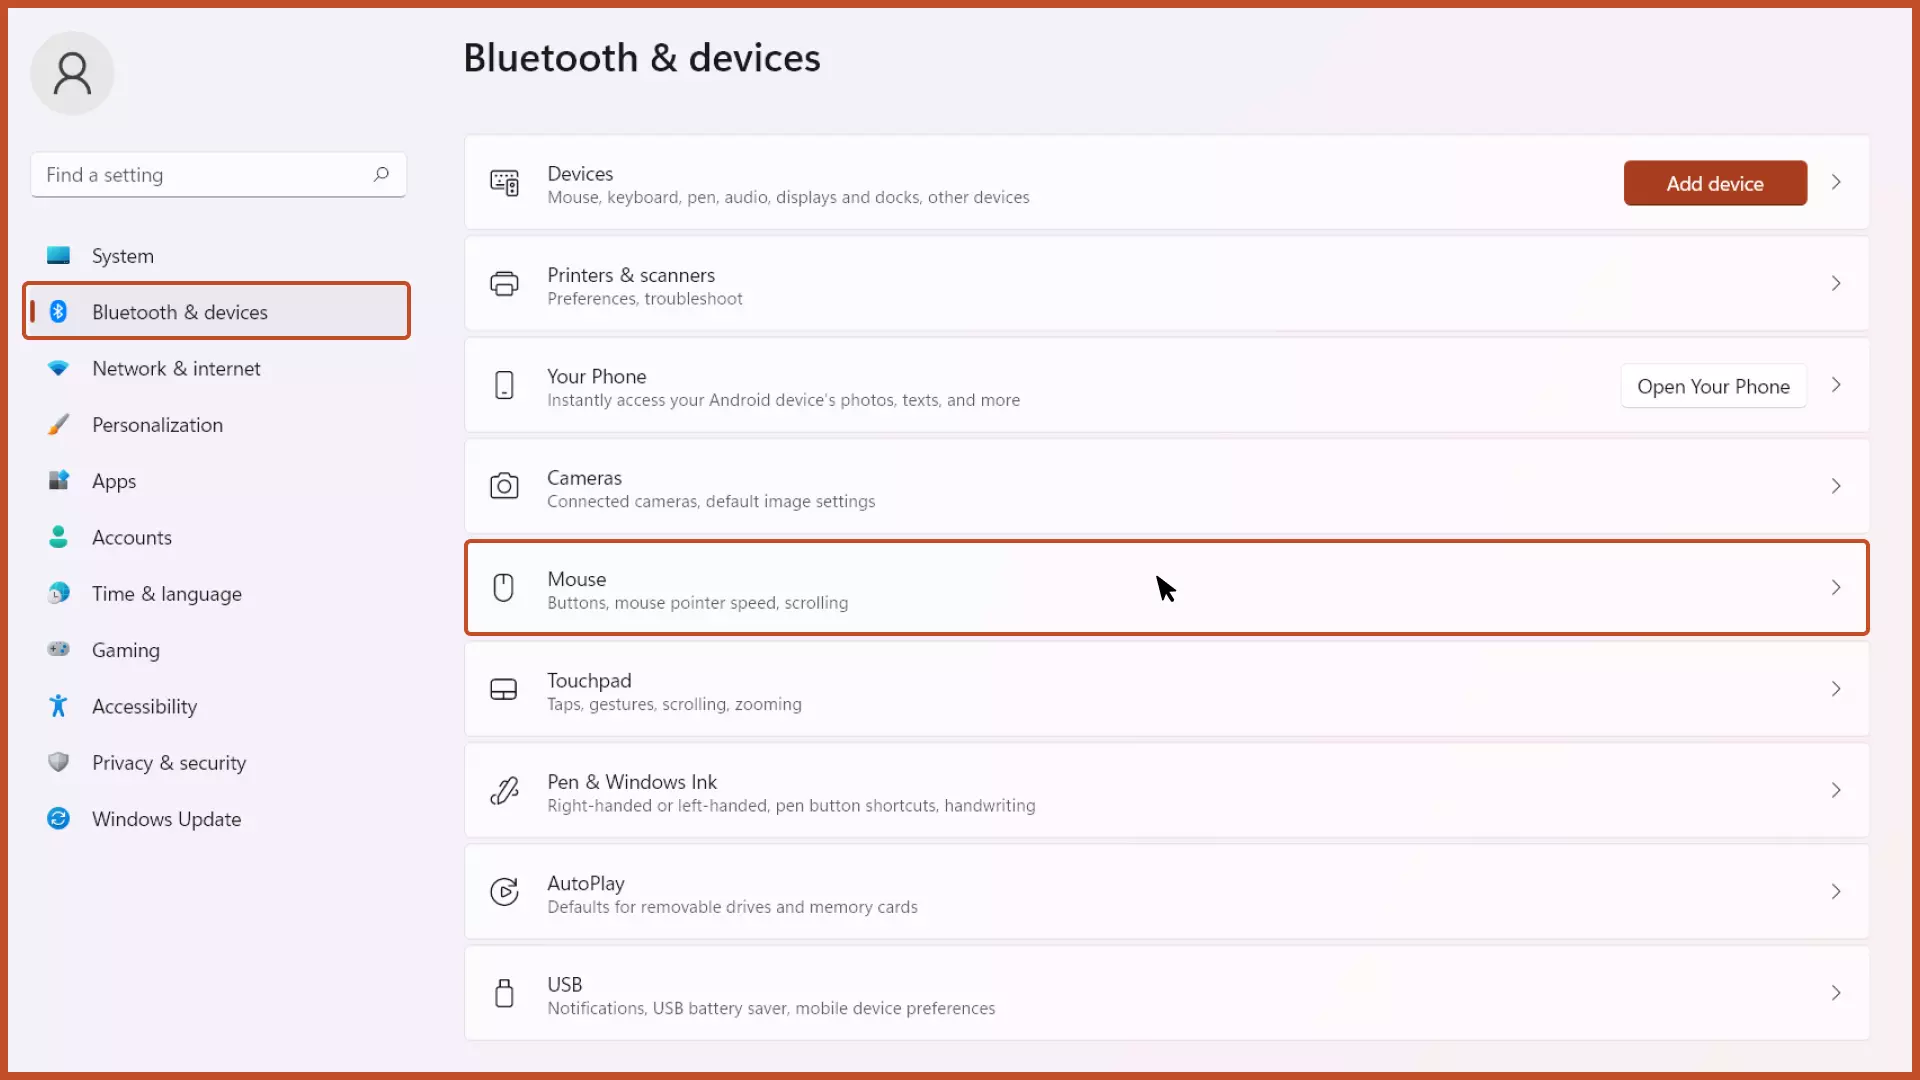
Step 3: Drag the slider to right to increase the mouse speed and left to decrease the mouse speed.

2. Using Control Panel
Step 1: Open the Control Panel from the Start menu.
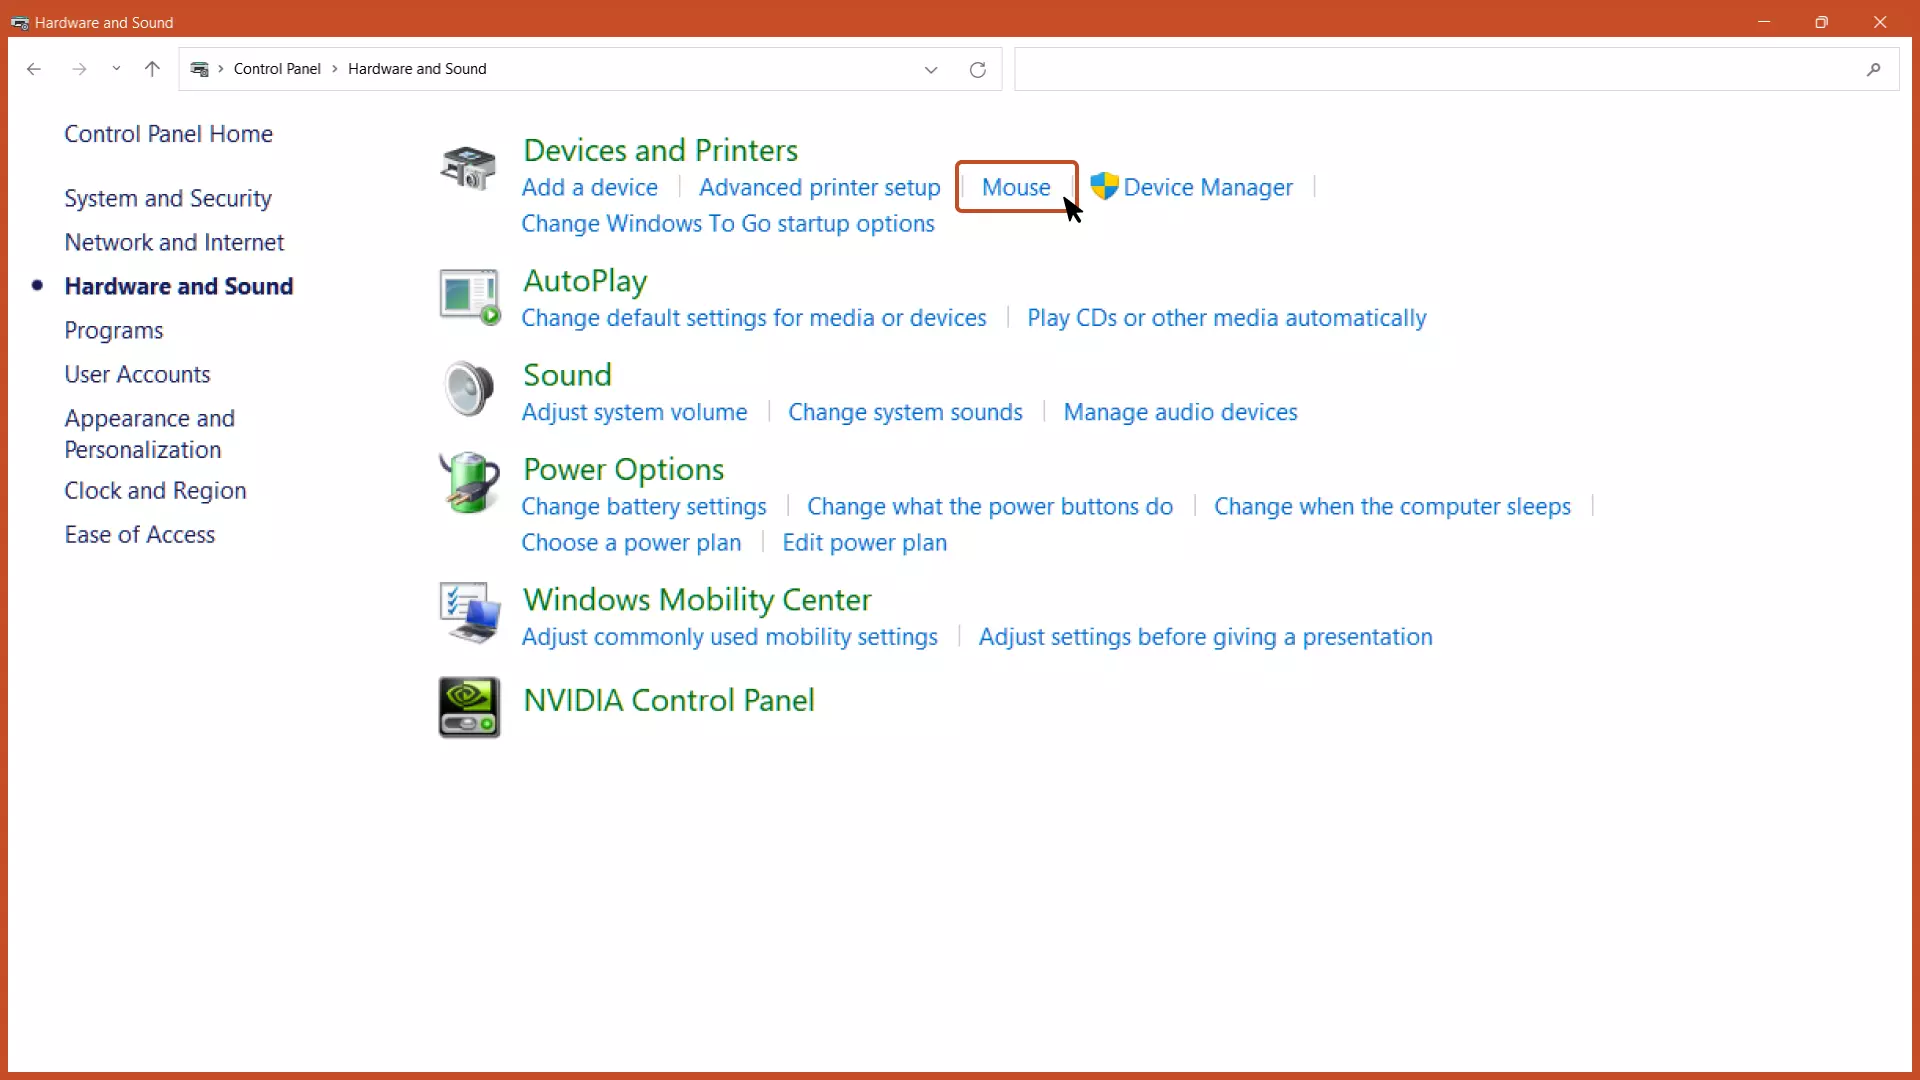
Step 2: Select the “Hardware and Sound” option.

Step 3: In the Devices and Printers section, click the “Mouse” option.
Step 4: Select the “Pointer Options” from the top menu. Now, under the “Motion” section, drag the slider to right to increase the mouse speed and left to decrease the mouse speed.
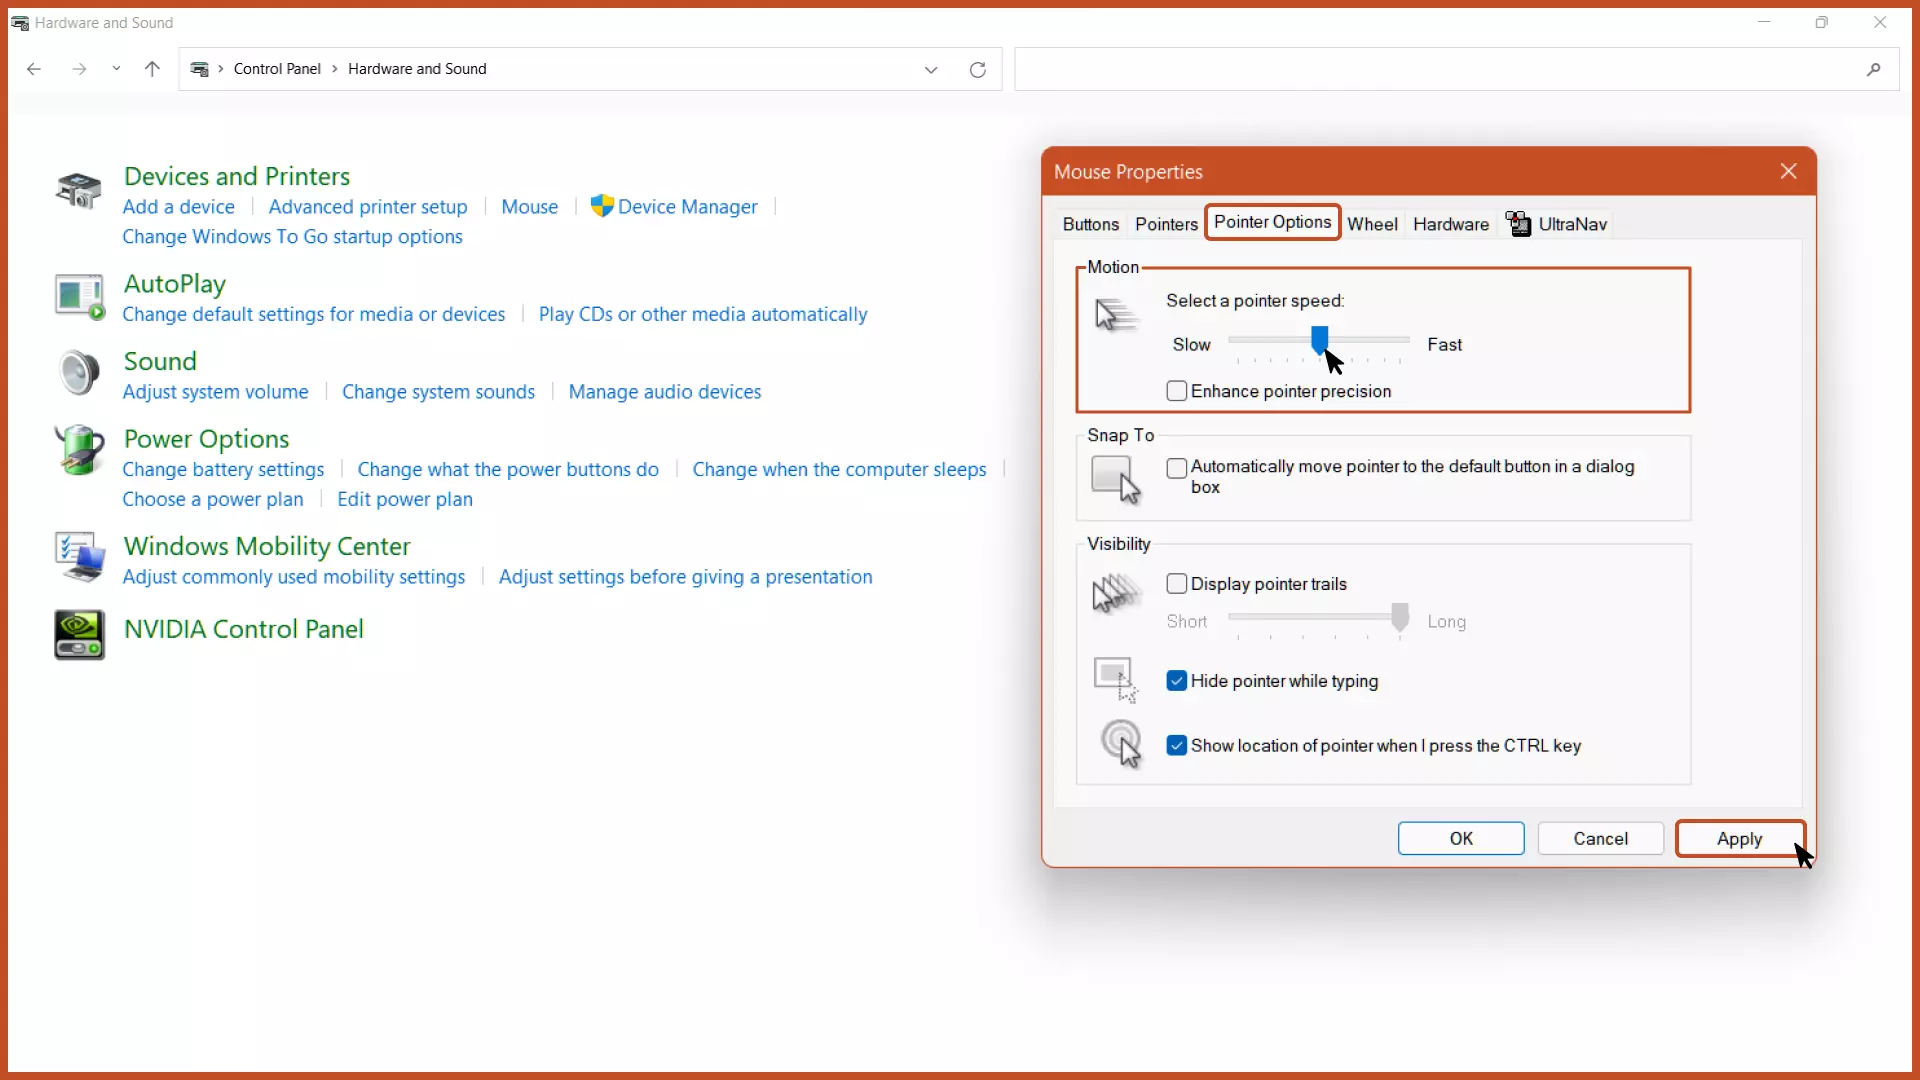
Note: If you feel that increasing the cursor’s speed makes it unstable and you’re unable to position the cursor on the component, simply click the “Enhance Pointer Precision” option, and the cursor’s precision will be much improved.
3. Using Registry Editor
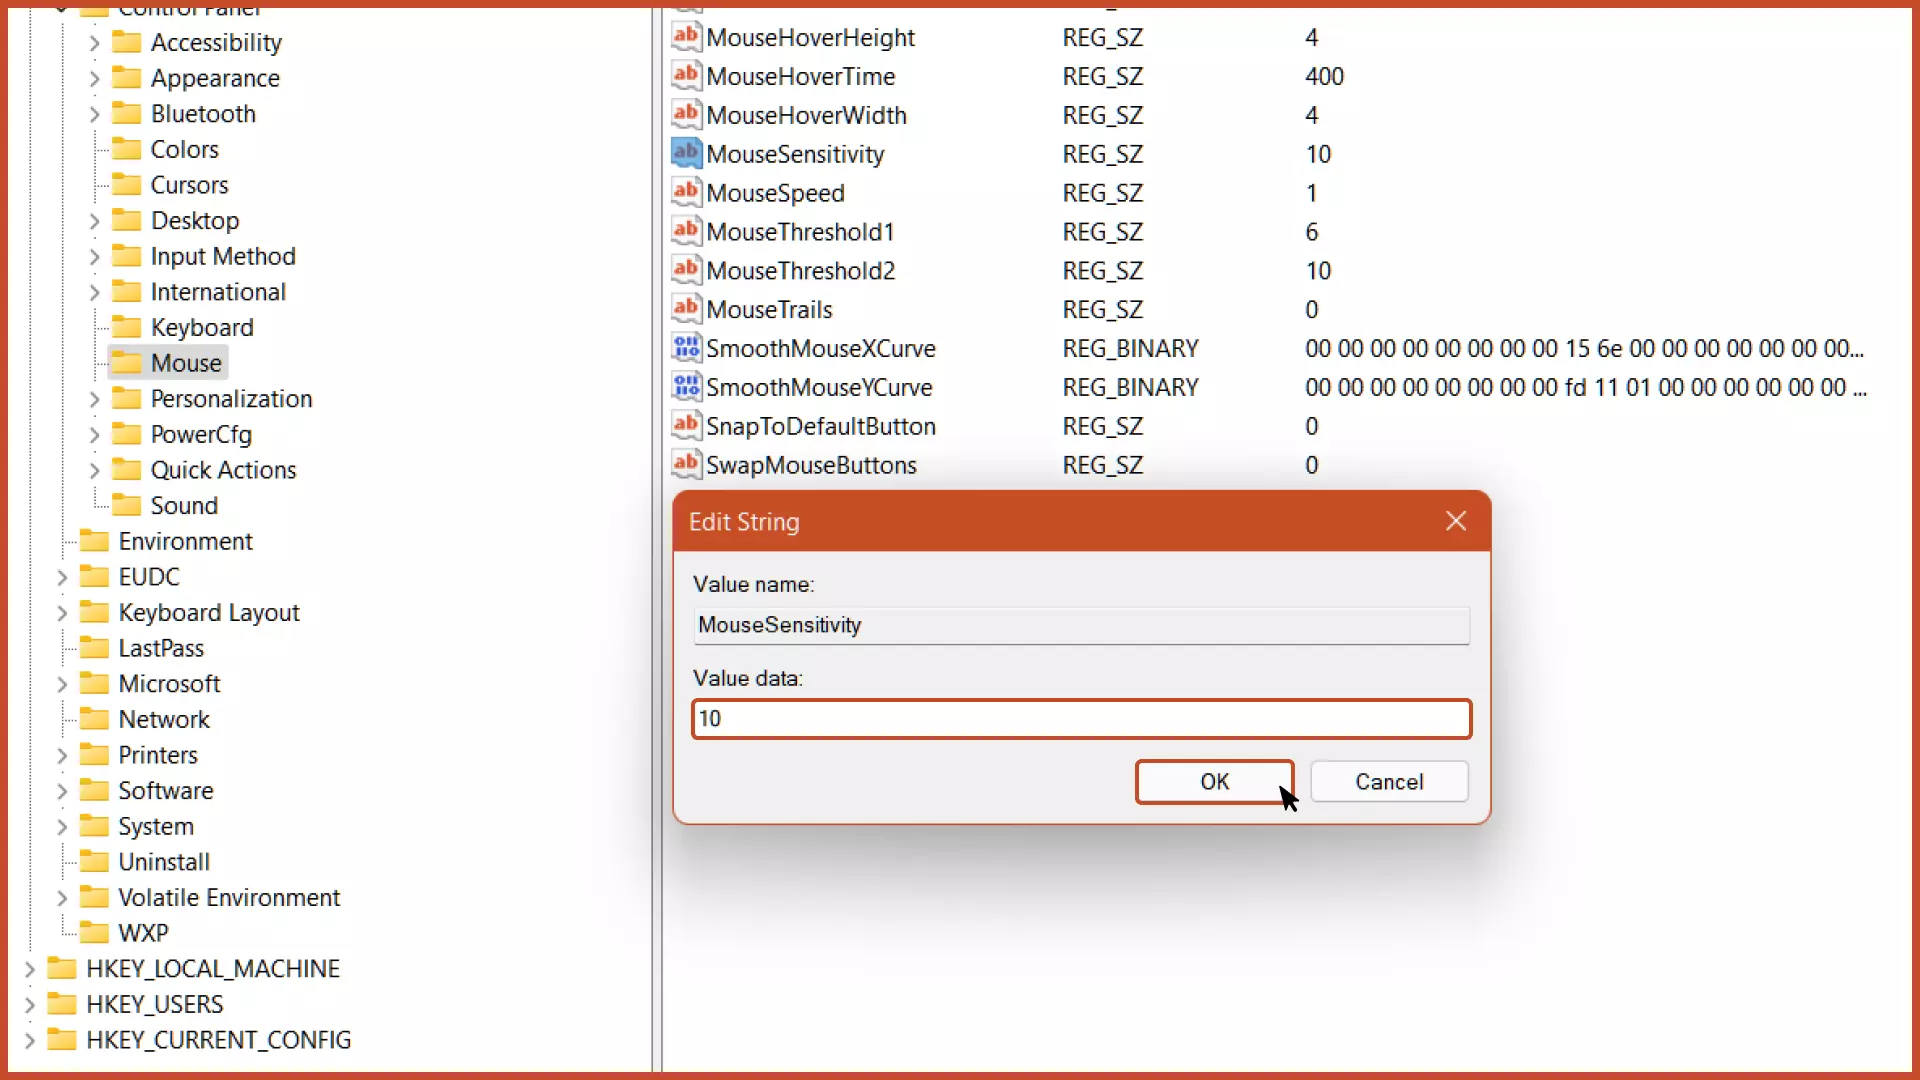
Step 1: Open the “Registry Editor” from the Start menu or press the “Windows logo key + R” key combination to open Windows Run, type “regedit” (without quotation marks) and hit the enter key.
Step 2: Navigate to the following path: HKEY_CURRENT_USER\Control Panel\Mouse and double-click the “Mouse Sensitivity” option.
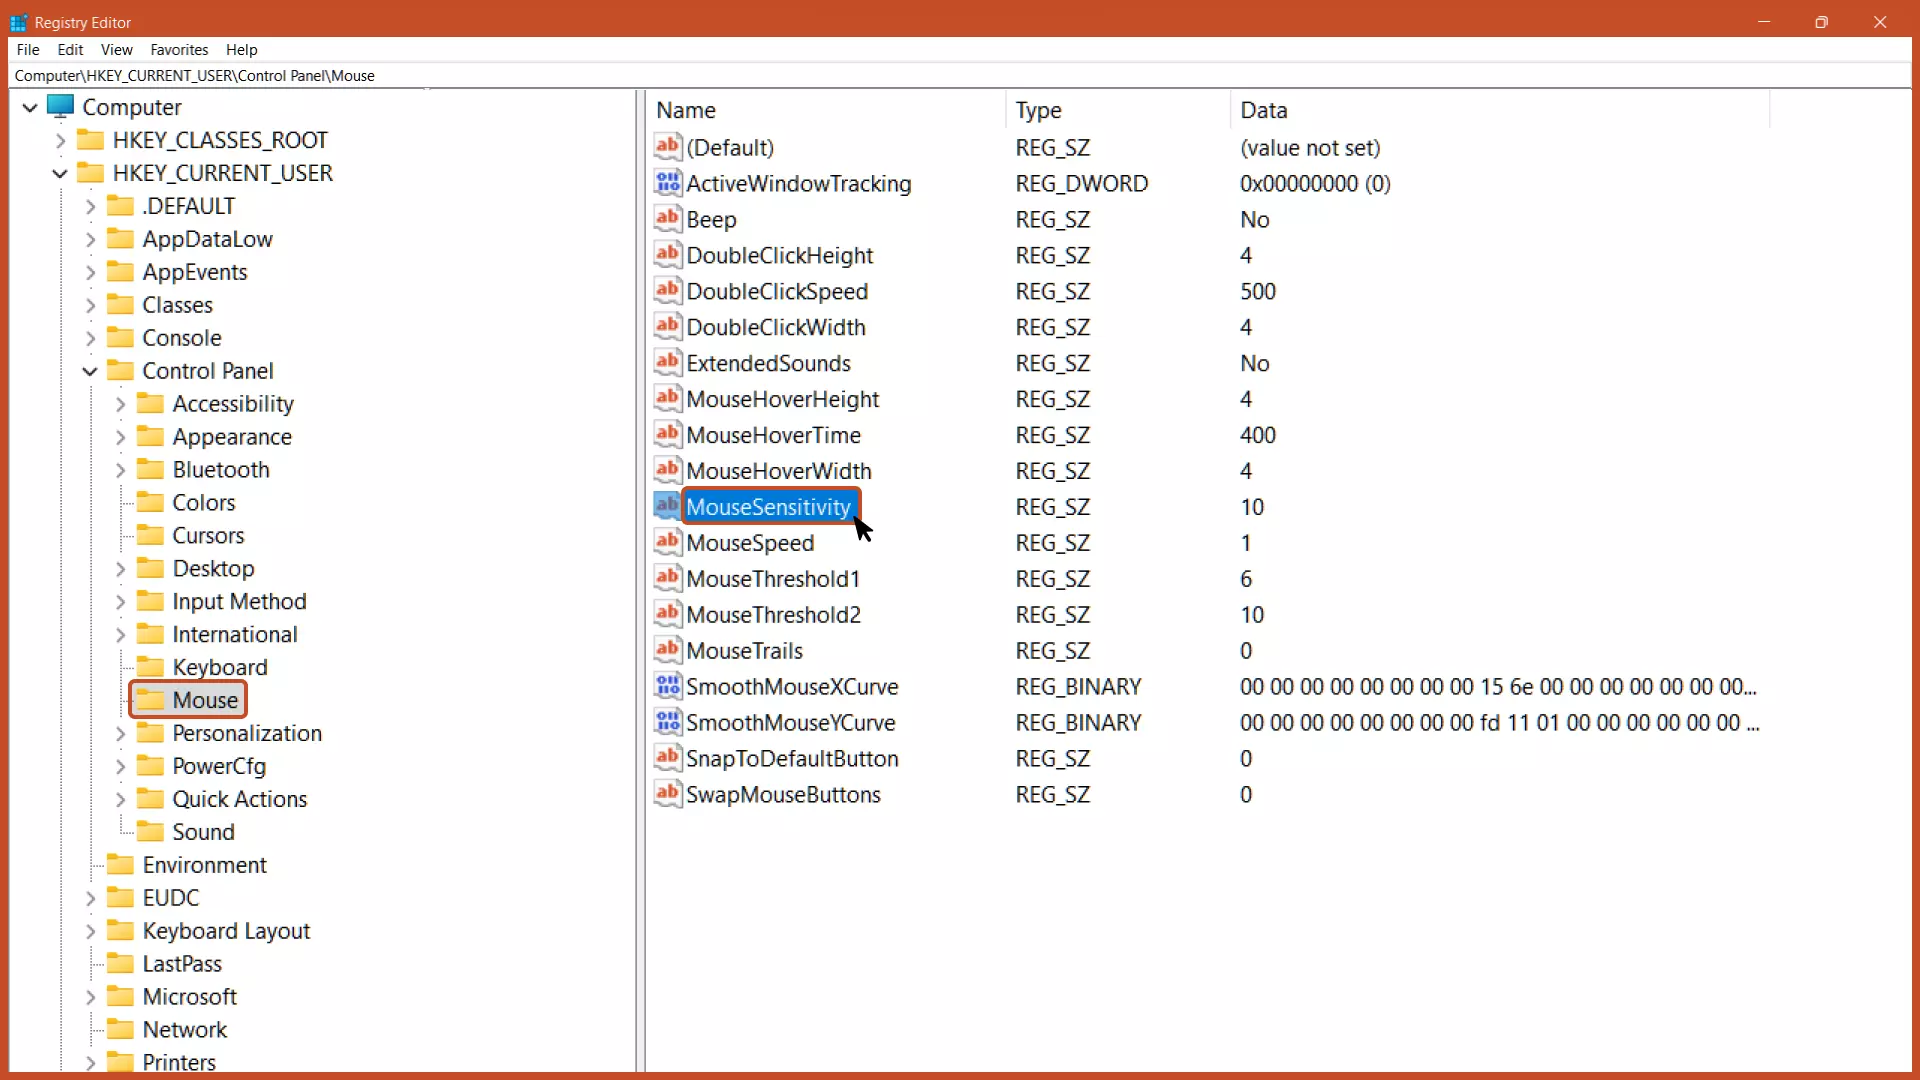
Step 3: The default value data is set to 10. To increase the mouse sensitivity, increase the value greater than 10, and, to decrease the mouse sensitivity, decrease the value lesser than 10.
The more the mouse sensitivity, the more the cursor speed.
Step 4: Restart the computer to make changes take effect and you’ll notice that the mouse cursor is quicker or slower than usual, depending on your settings.

Conclusion
In this article, we’ve covered how to change mouse speed in Windows 11.
Adjusting the cursor’s speed as per your preference can help to improve your efficiency, workflow, and overall productivity. Also, it can assist you during gaming and help to improve it.
Related Articles

Disable Visual Effects in Windows 11
Speed up your device’s performance by disabling the visual effects in Windows.

Swap Mouse Buttons in Windows 11
Swap the functions of the left and right buttons on your computer for better mouse control.

Reinstall drivers in Windows
Facing some hardware issues on your device? Try reinstalling the respective driver and fixing the issue.
